close

Beauty Tips and Health Fitness

Beauty Tips and Health FitnessSkin Care

How to Make Your Nose Look Thinner with Makeup

How to Make Nose Smaller & Thinner with Makeup

Hello, dear ladies, life is so fast, day by day, the world is magically having success in everything. We are inventing new things, new style, new visions and new lifestyles, as all these things are making the world a better place. So we all are achieving them and forwarding ourselves. Similarly, the fashion world is not behind; it’s inventing and discovering a magical arts and techniques in makeup, dresses, and everything. Here I’m going to discuss, one of the super techniques that our makeup artist have invented. Dear girls, as we all know, makeup tips count a lot now in a makeup, even as a single mistake, can ruin your make up.

How to Get Thinner Nose with Makeup- Step by Step Tutorial:

Today I’m going to share best and easy tutorial technique for you that tells how to make your nose look thinner with makeup. If you have the bad and broad nose, then this is not going to ruin your makeup taste. These are some techniques that will help to have a pretty thin nose.

Things you Need:

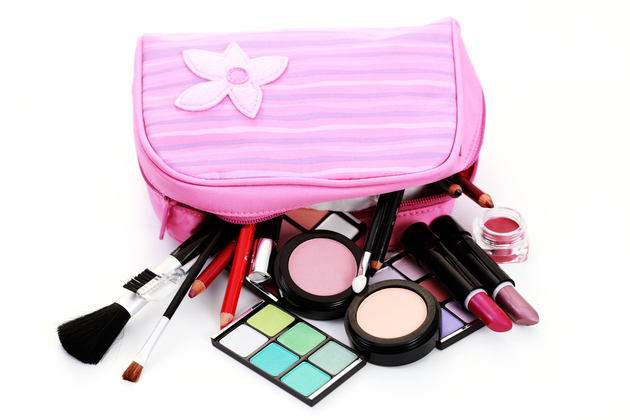
Dear ladies, before starting a make-up you must have these things in your makeup bag. Do you have these things?

  • Makeup base, Foundation, Concealer
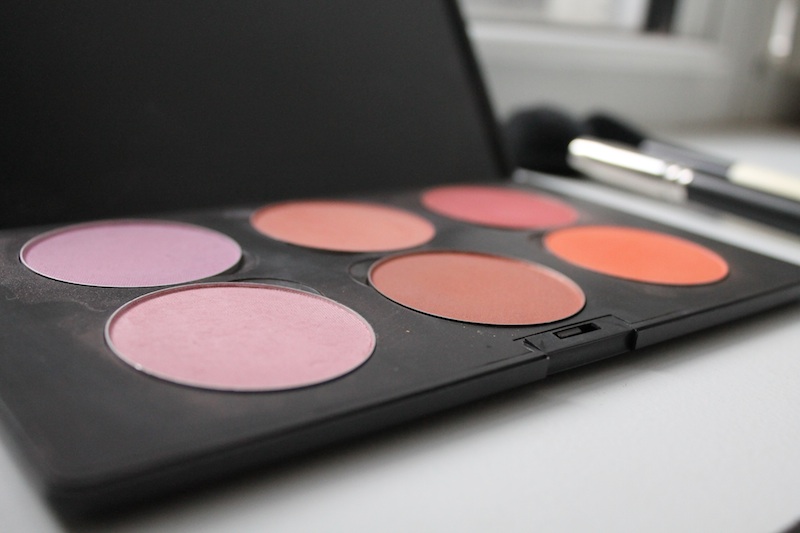
  • Blush (pink or peach)
  • Bronzer
  • Eye Makeup Items including eye-shadows, mascara
  • White eye shadow
  • Eye Shimmer
  • False eyelashes(optional)
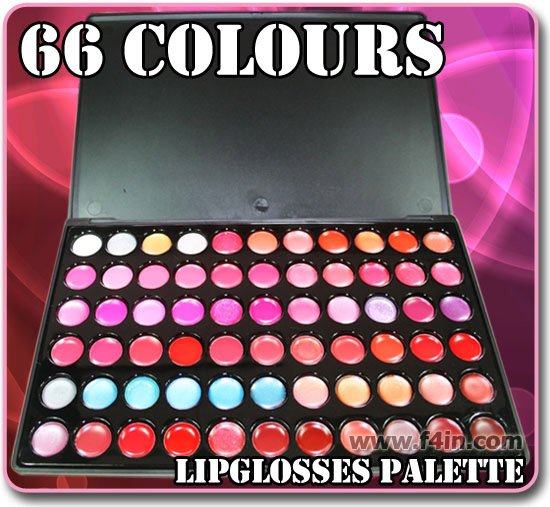
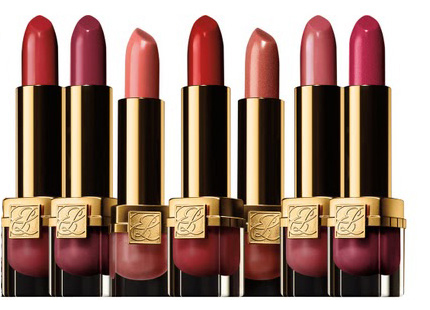
  •  lipstick kit
  •  Makeup brushes or tools

How to Get Thinner Nose with Makeup- Step by Step Tutorial (4)

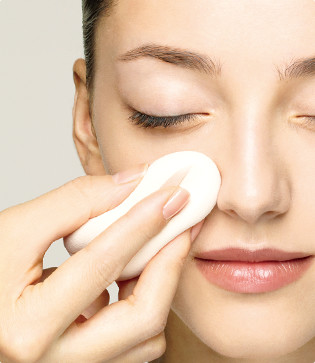
Cleansing Face:

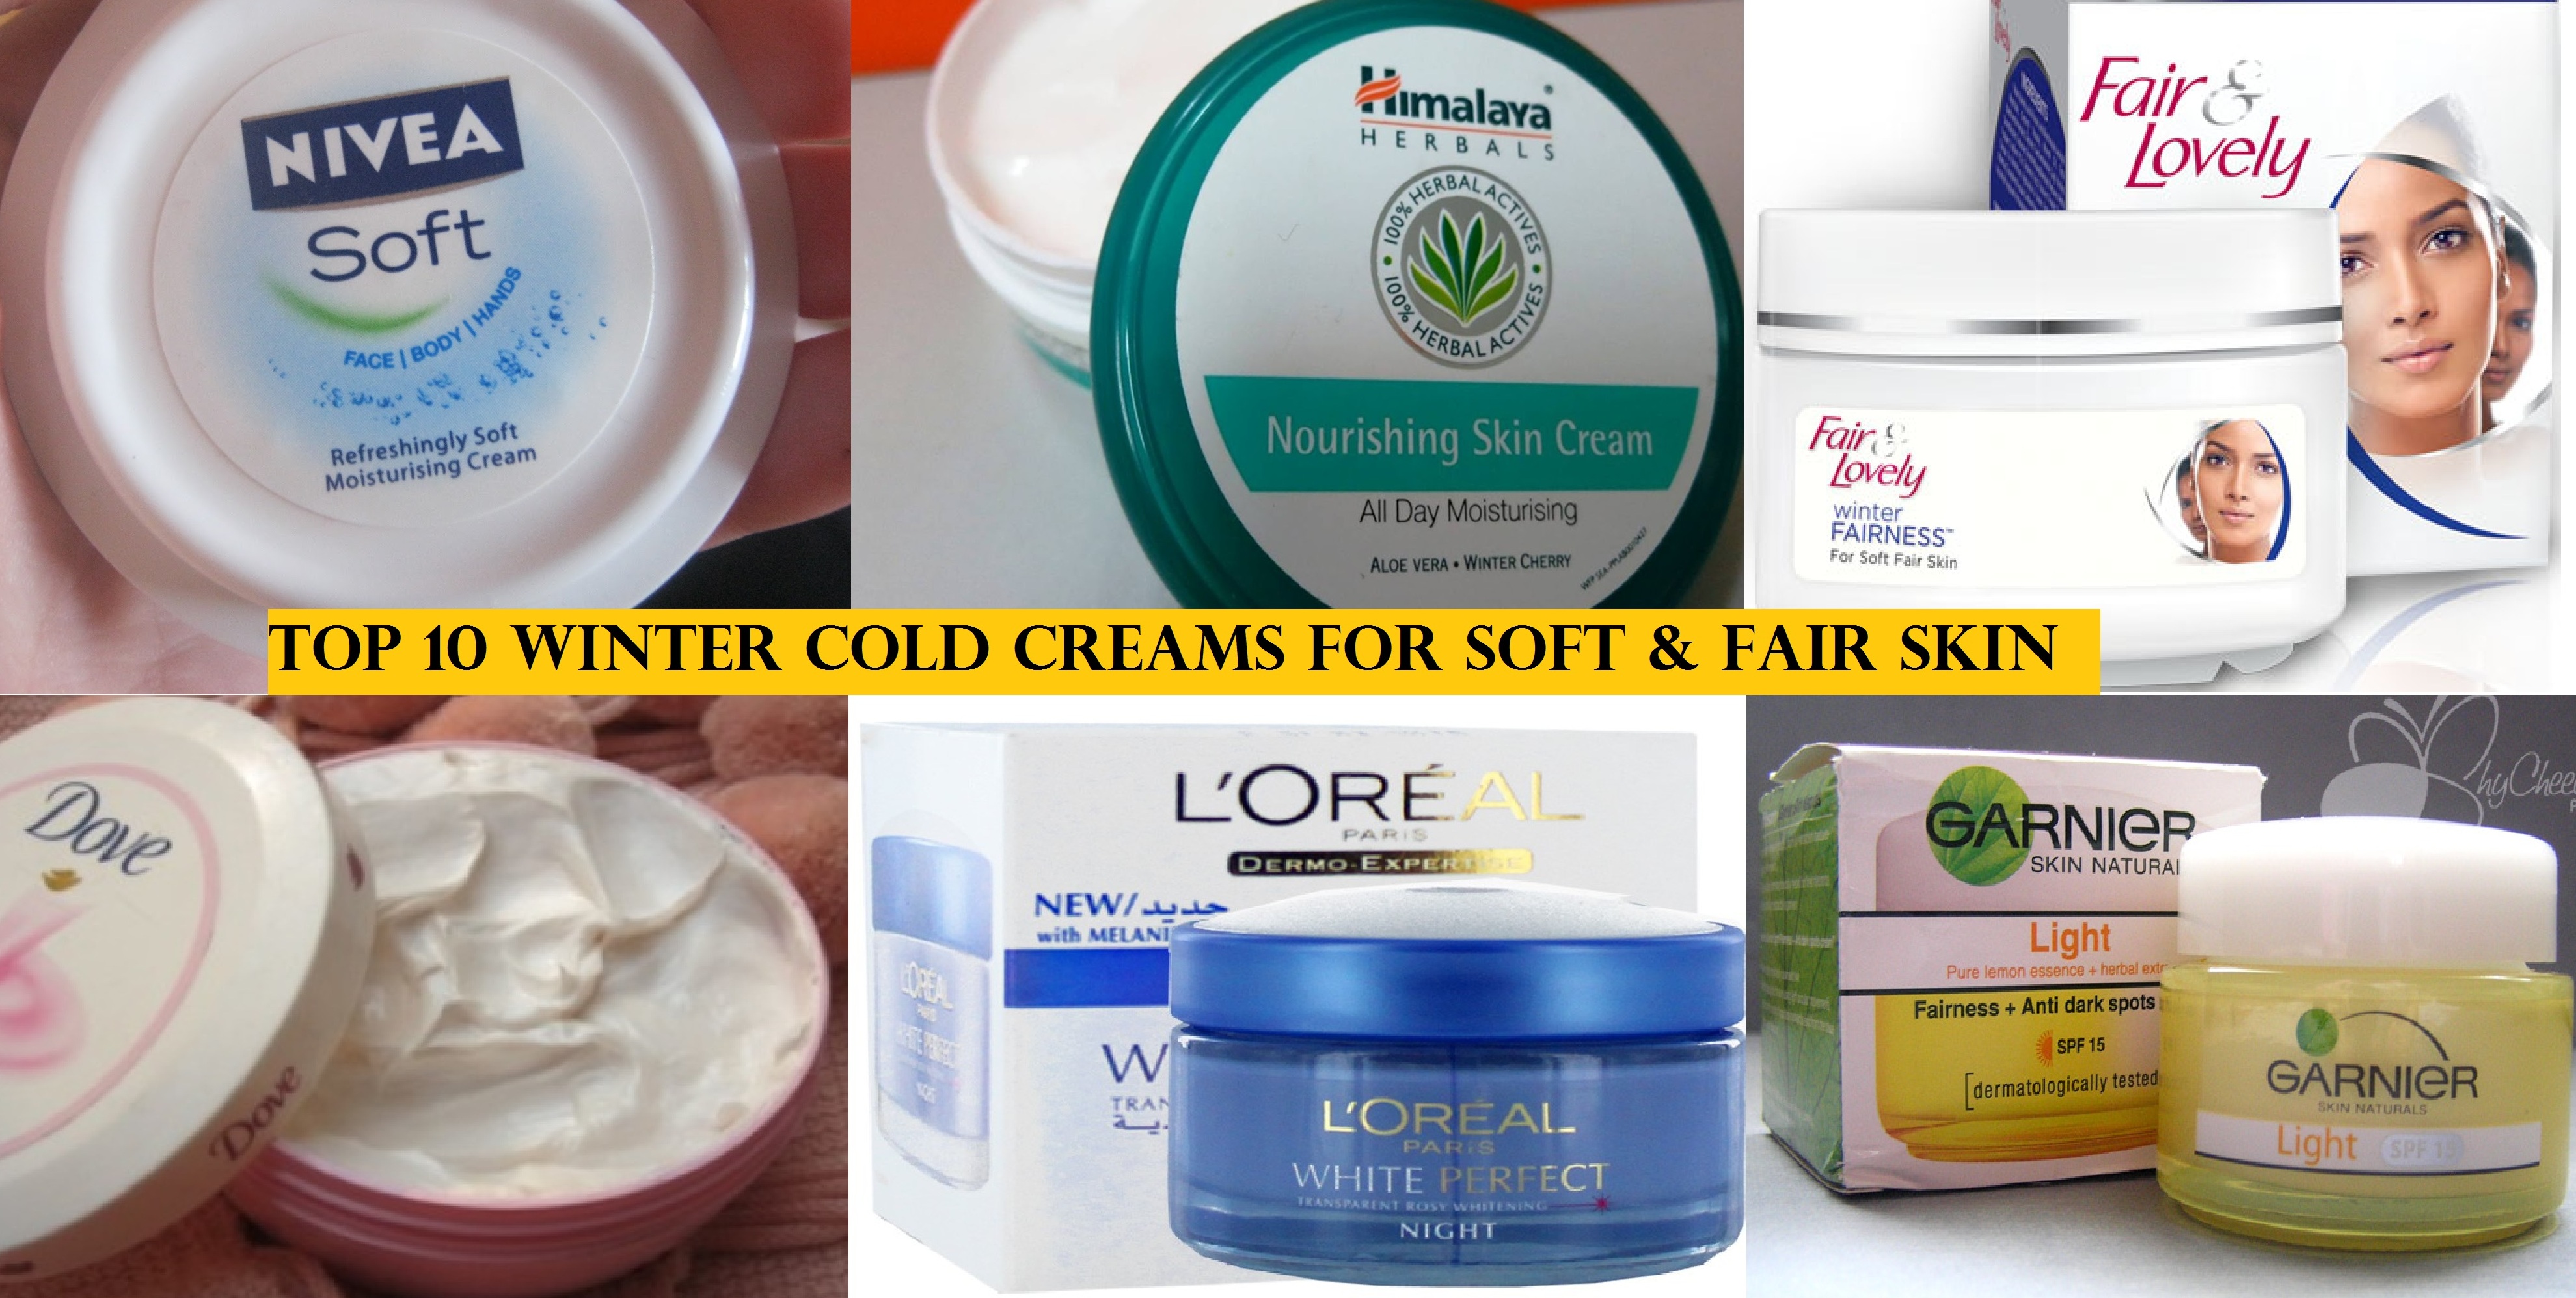
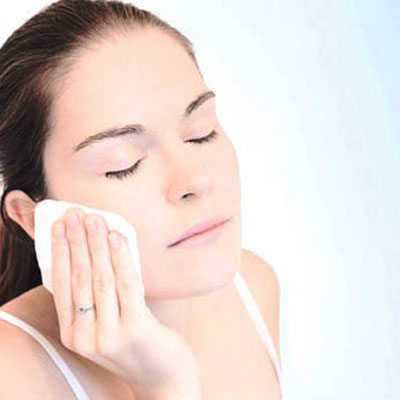
First wash your face with firm soap or face wash. It depends on you what type of skin it is, select your face wash according to your skin characteristic. I would recommend some face washes that even remove your white or black head from face skin or a nose. These are the Himalayas, Clean and Clear, Dove, and many others are famous.

cleansing face

Nose Cleansing:

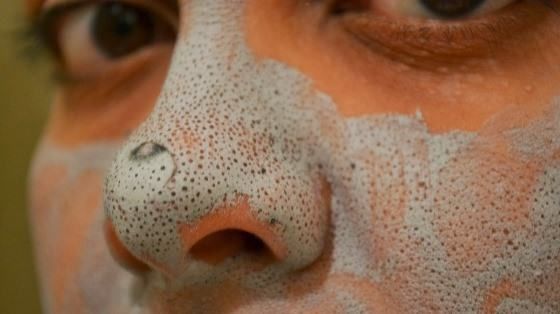
It’s really important to take care of your skin. Cleansing is the part of your makeup; it helps you to prevent your skin from dust, extract the roughness of the skin from the face. If you have blackheads or whiteheads on your nose, then you need to clean them before starting a makeup. I would suggest you the best cleansing milk that can help you to have clear and soft skin, as these are: Nivea Visage Refreshing, Himalaya deep cleansing, Nivea Aqua Effect refreshing, Clarins cleansing milk. These cleansing milk are very good and give the best result, although they are reasonable too. Clean your nose and remove all spots and heads.

How to Get Thinner Nose with Makeup- Step by Step Tutorial (5)

Making Base:

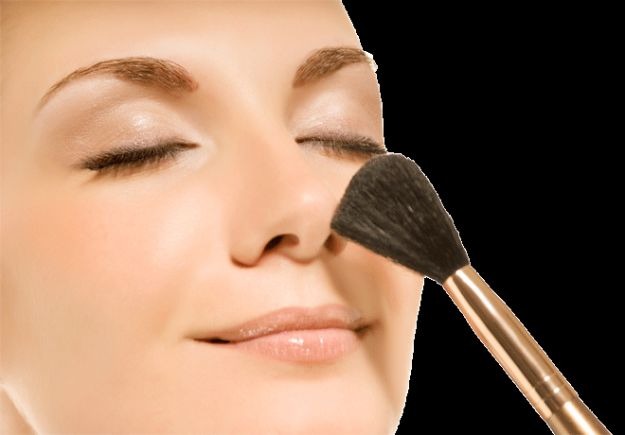
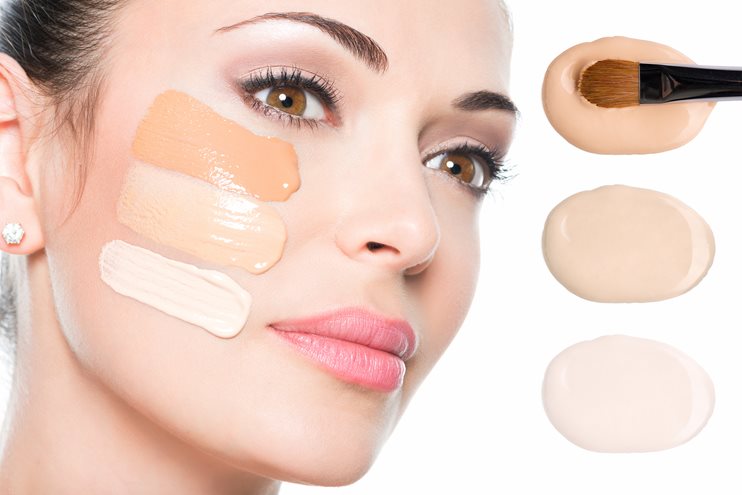
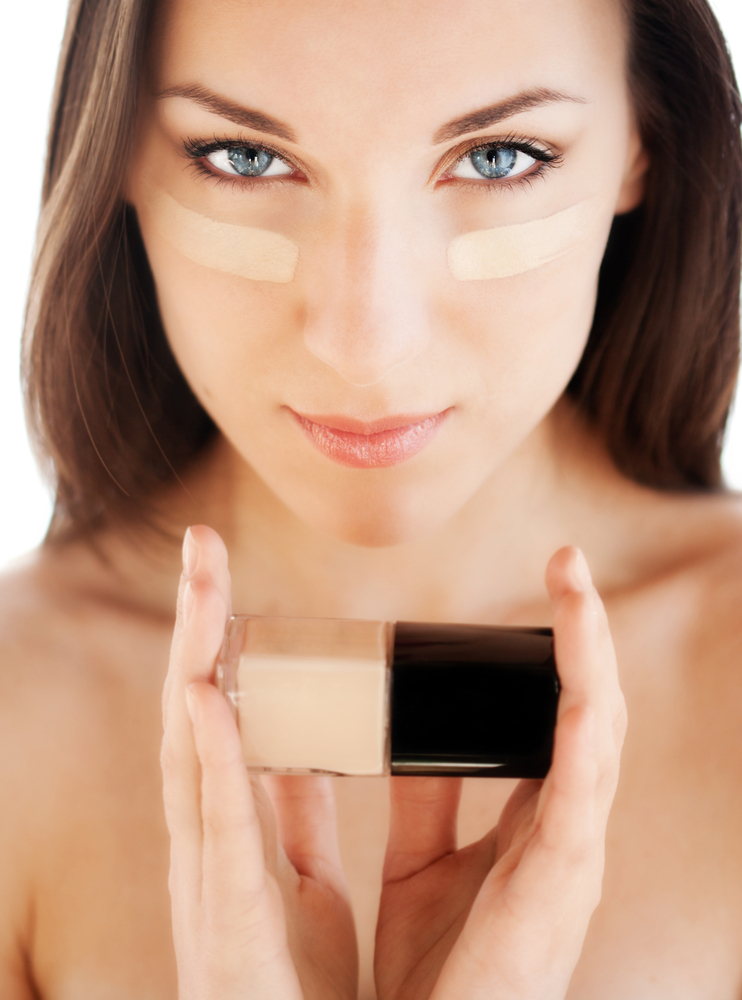
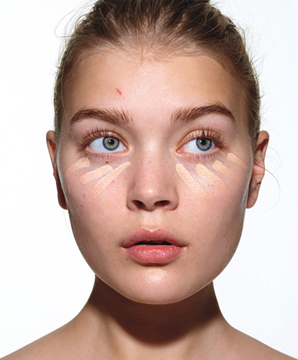
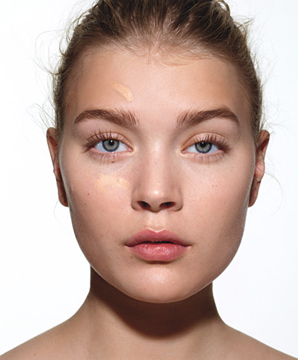
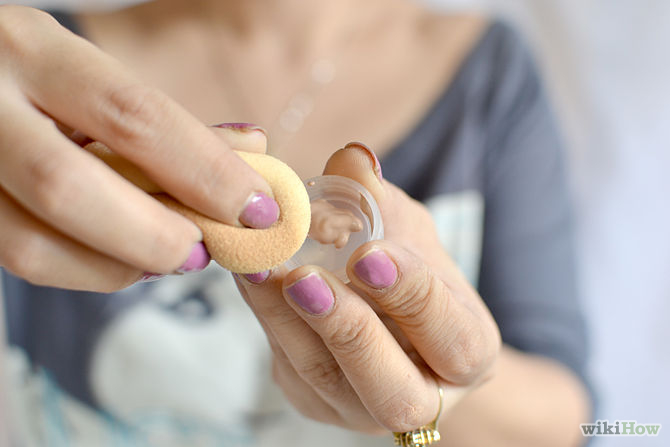
Now it’s time to apply a base on your face, it’s your choice to apply a face powder or a foundation, that your skin prefers the most, you just need to tune your skin so well. Wow, what a perfect palette is ready to apply other makeup products.

base makeup

Face Contouring:

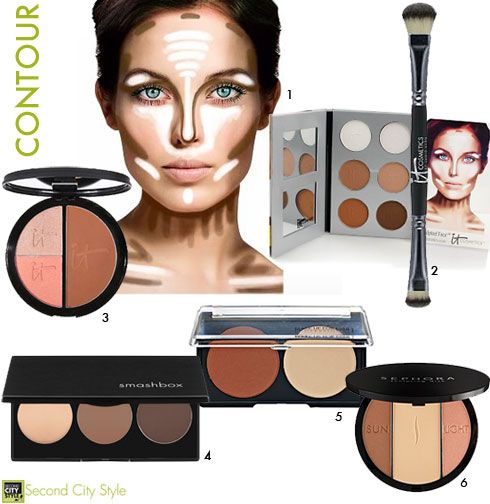
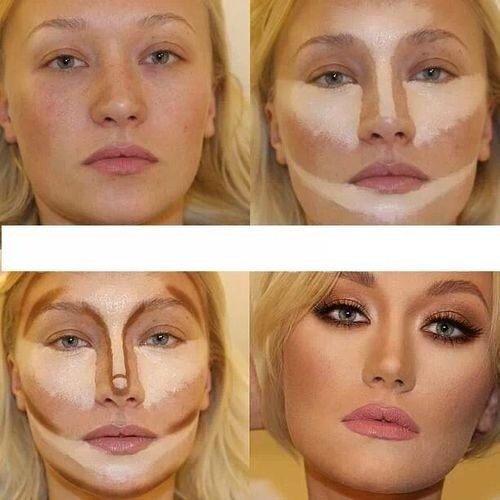
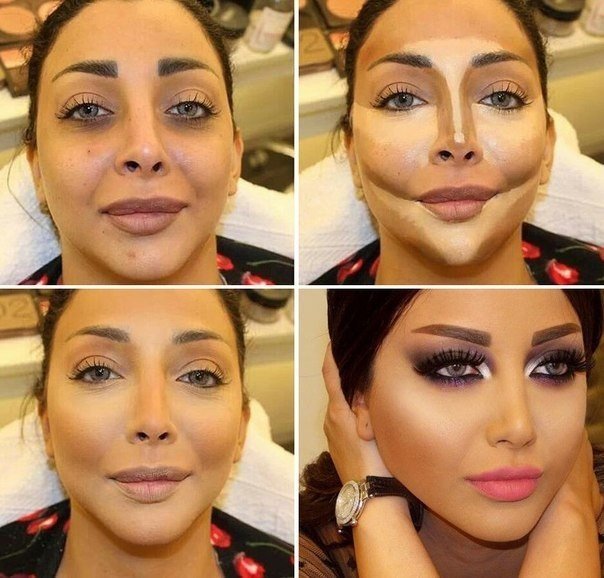
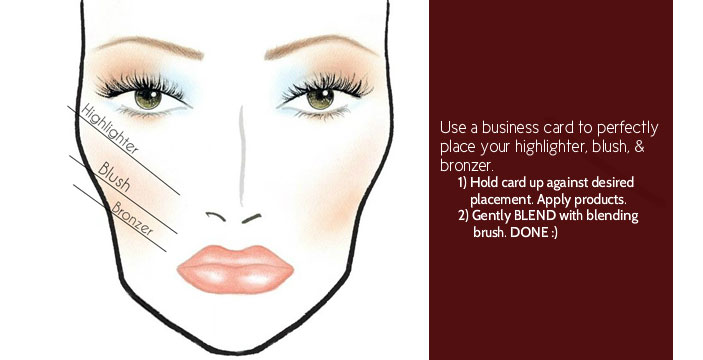
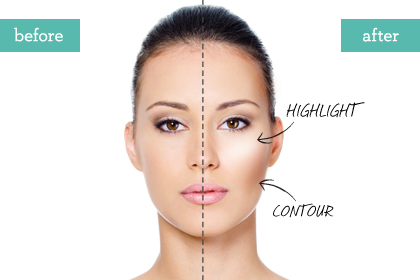
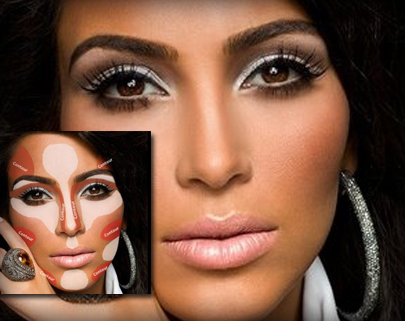
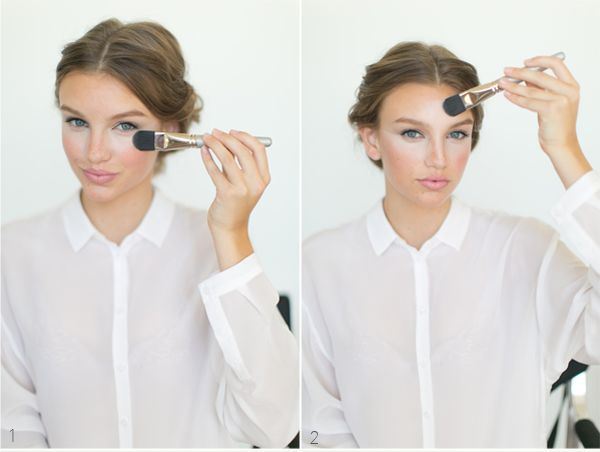
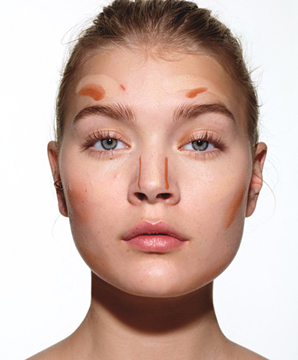
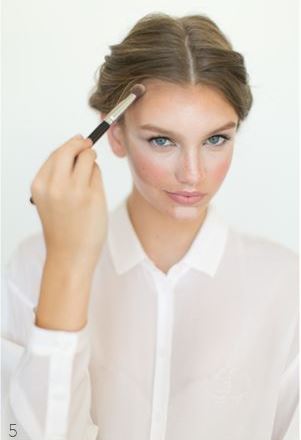
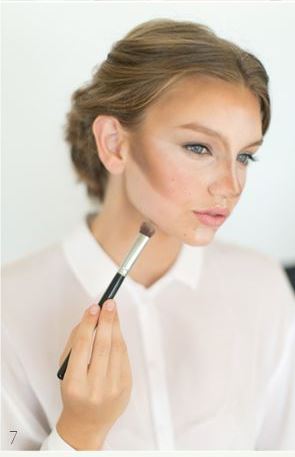
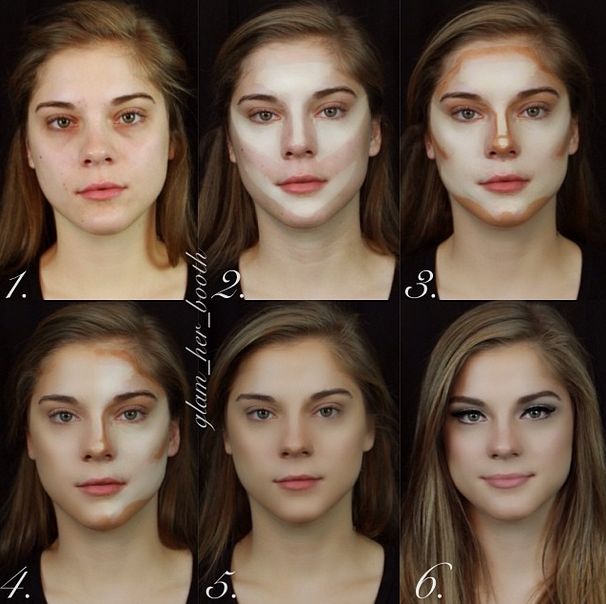
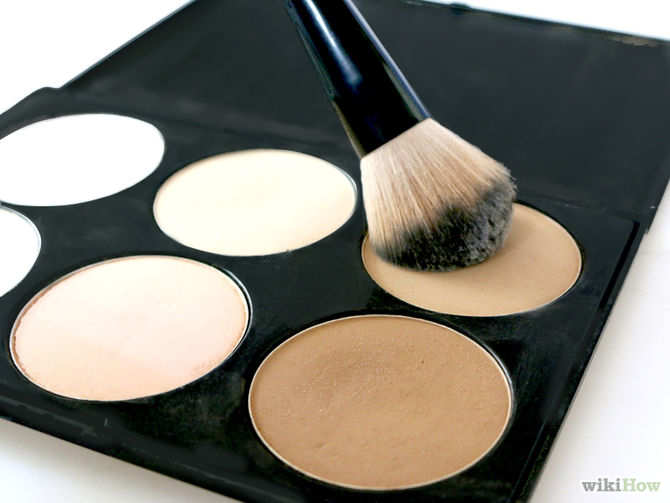
After applying a foundation or a base, now you need to enhance the features of your face with the help of contouring part. Just follow these steps as shown in pictures:

How to Get Thinner Nose with Makeup- Step by Step Tutorial (8)

Nose Contouring:

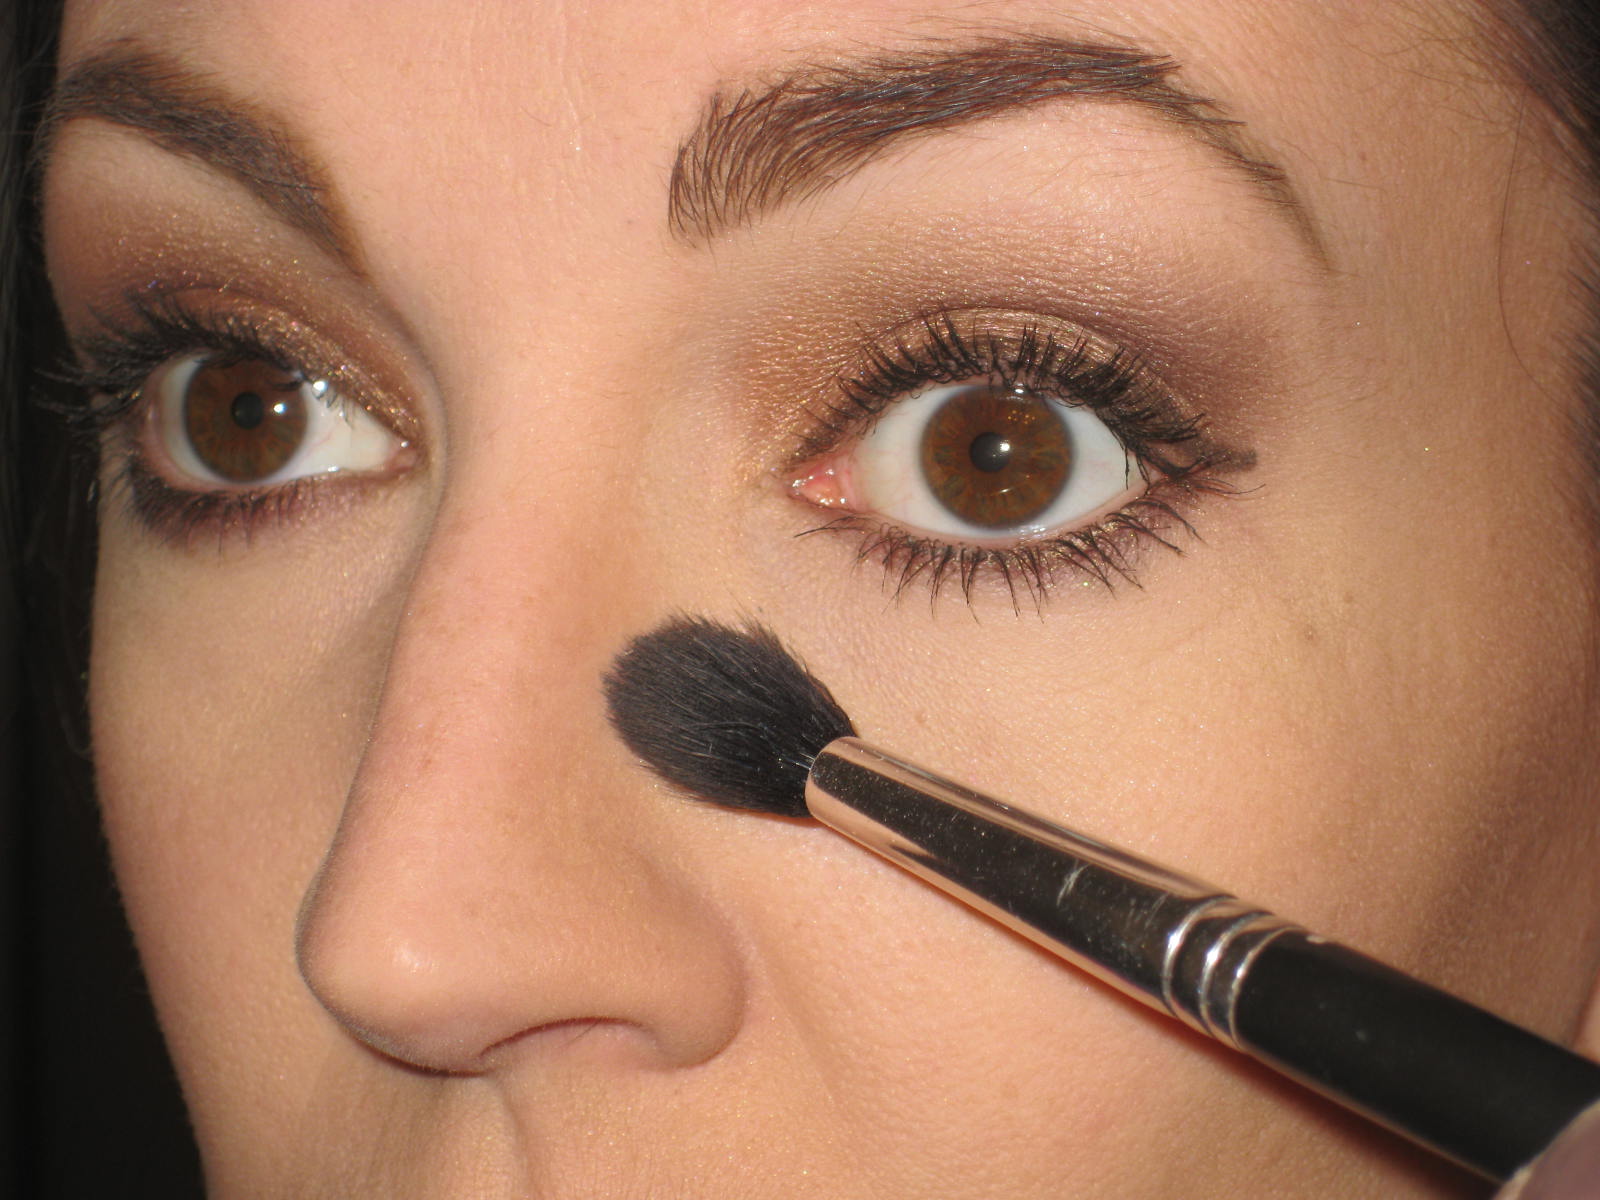
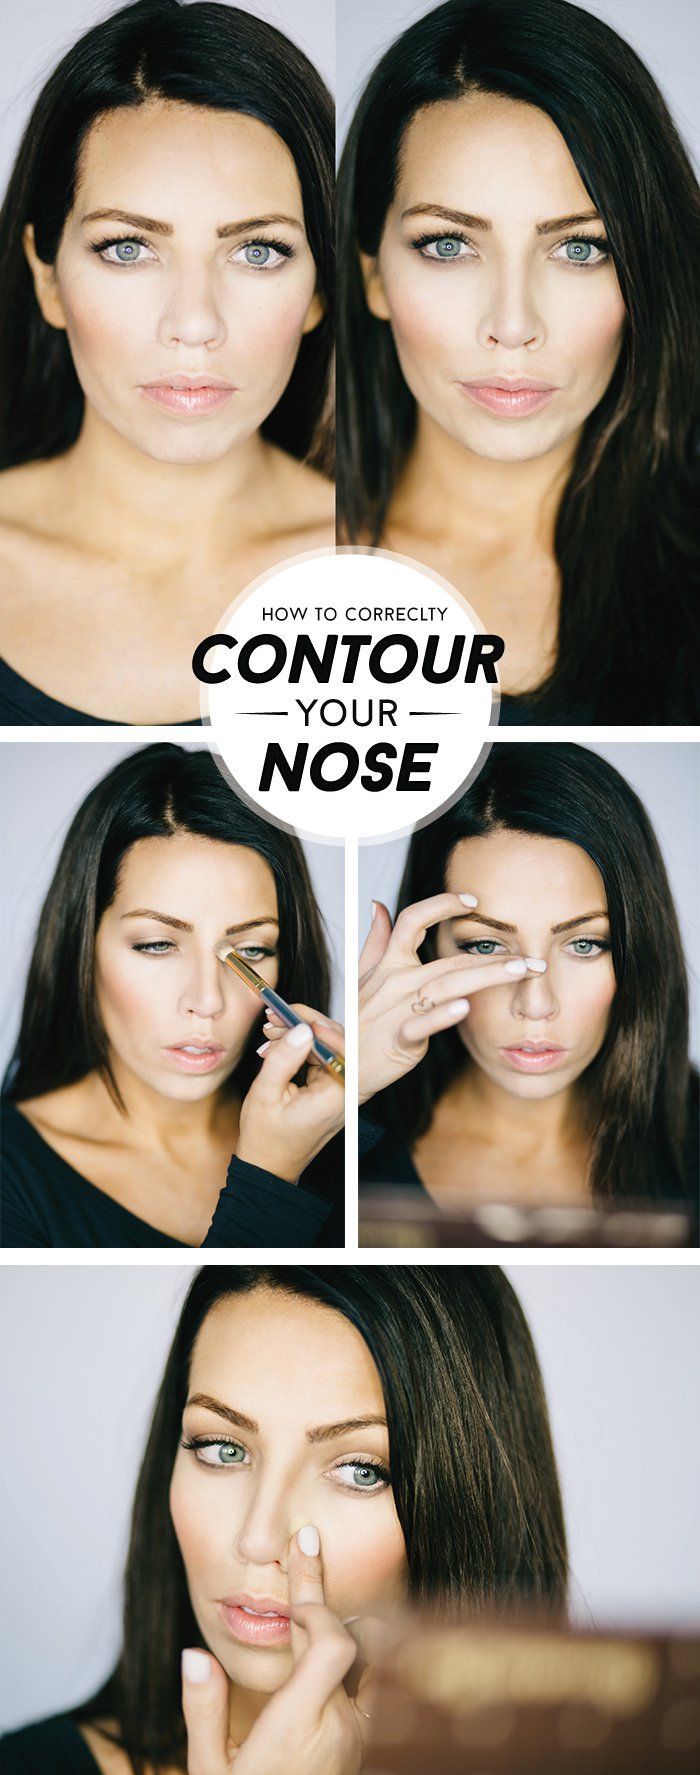
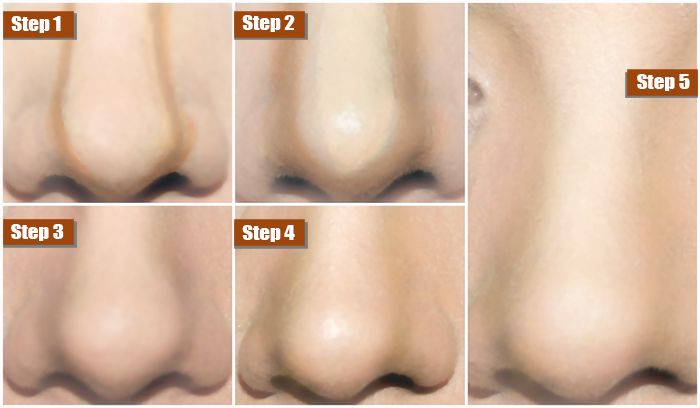
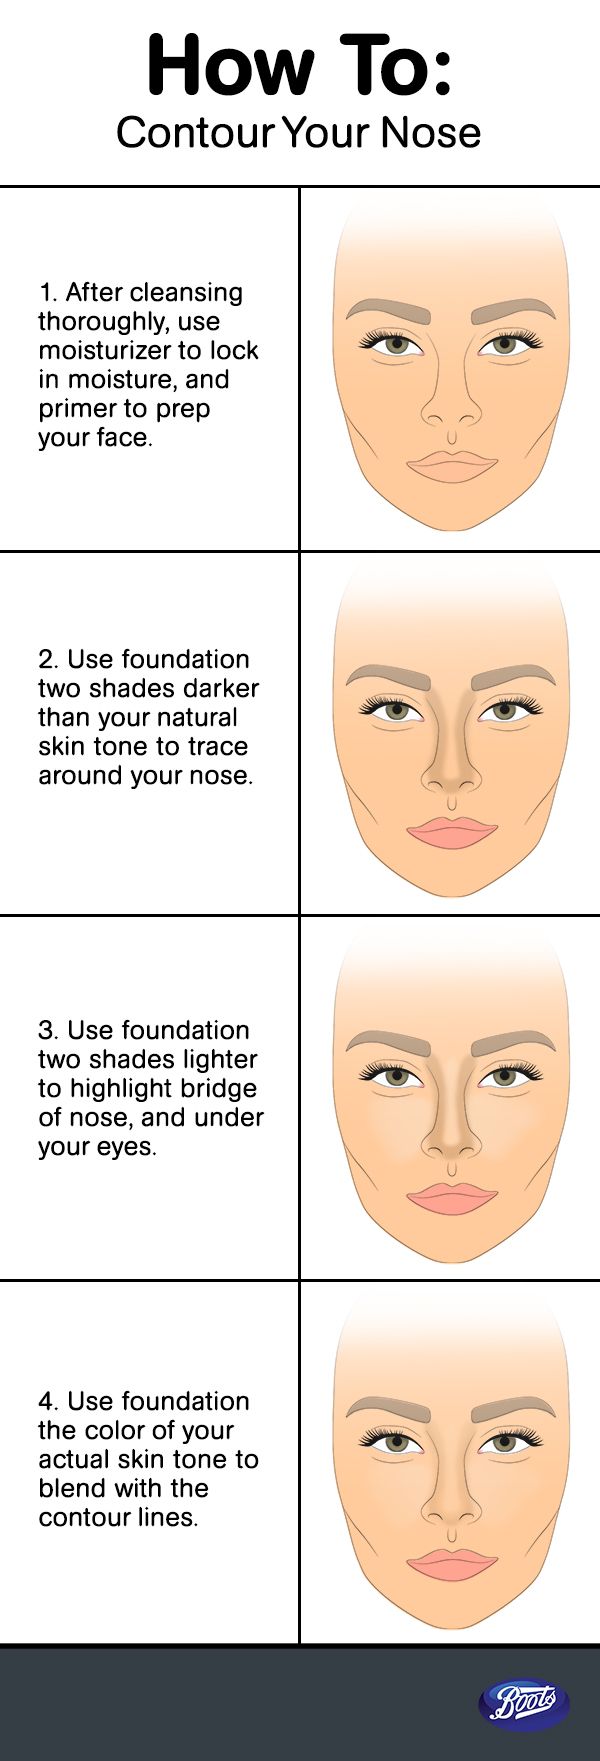
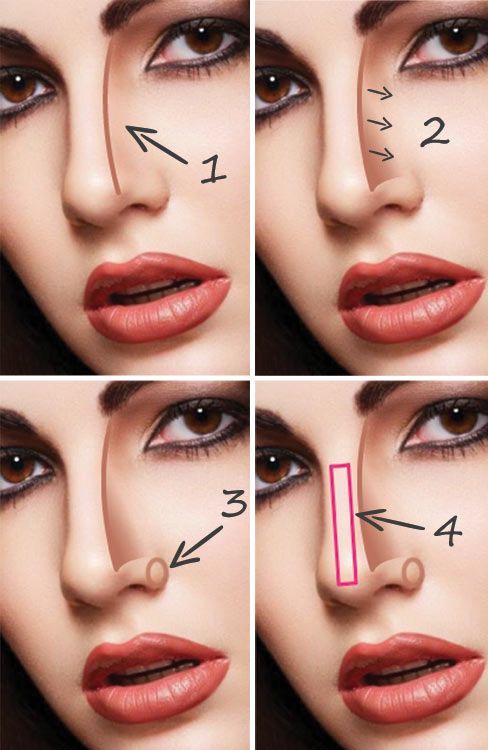
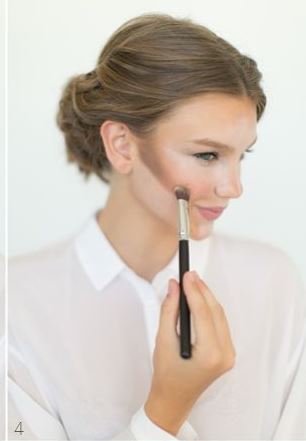
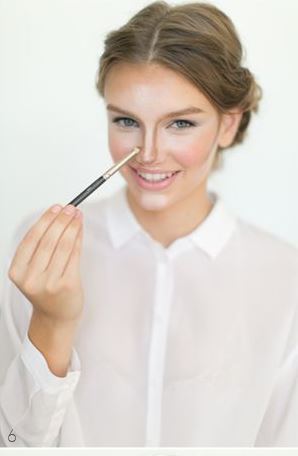
After applying a contour base on cheeks, forehead and chin, you need to contour your nose. So what do you want? As we all know, thinner nose always looks so smart and hot, it makes your look more attractive and charming. As many of you want to have a thinner nose. So what techniques are behind it? Dear ladies now need not to worry. his tutorial will give you the best technique that can help you to have a thinner nose that you’re wondering to have it. The first step is contouring of your nose, apply contour base like a line on the sides of the nose as shown in the pictures. (pictures)
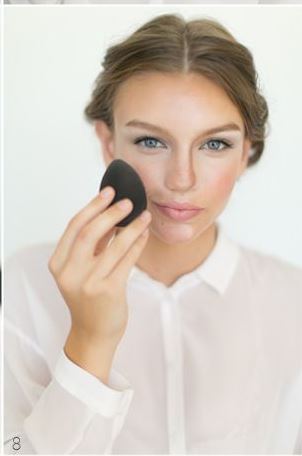
Now start merging a base and bronzer, with a help of the sponge or a contouring brush. Yes, dear lady, your nose looks thin now by the magic of the makeup. Follow these pictures:

How to Get Thinner Nose with Makeup- Step by Step Tutorial (7)

How to Contour Your Nose to Make it Smaller- Tutorial

How to Get Thinner Nose with Makeup- Step by Step Tutorial (1)

White Nose Line :

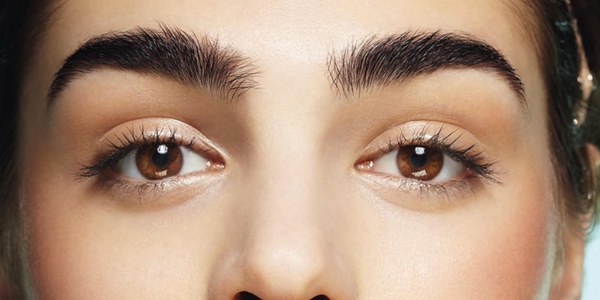
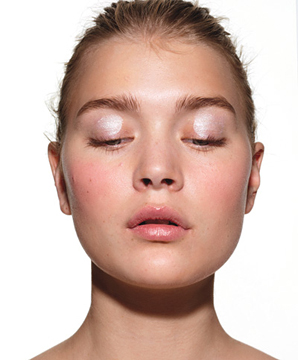
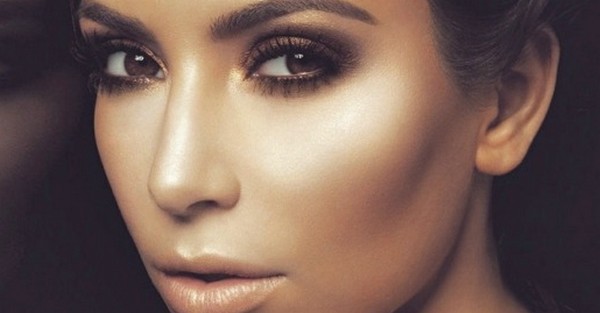
Here is another tip that you can call it a second tip, here you go. Take out your white eye shadow, now with the help of finger just make a line on the nose front bone slightly. Here it gives slim and straight look, I call it best tip ever as when you take snaps, your nose looks straight and slim in the pictures.

How to Get Thinner Nose with Makeup- Step by Step Tutorial (2)

Blush on and shimmers time:

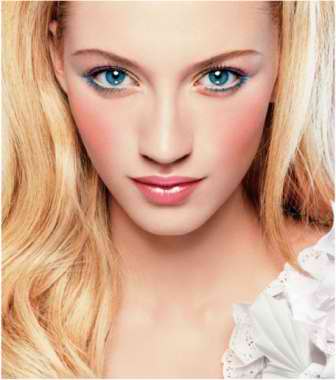
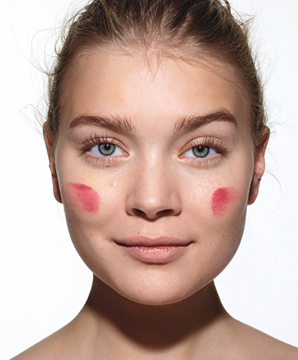
Apply blush on whatever color do you want to. But keep this in mind that you must apply a shimmer before applying blush on. It will give the shiny and attractive look to you.

How to Get Thinner Nose with Makeup- Step by Step Tutorial (13)

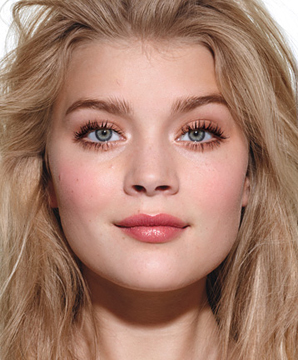
Final touch:

Time for eye shadows, apply shadows whatever type you want to and apply a lip color then. Here you’re ready to have a perfect nose that looks thinner, slim and smart.

How to Get Thinner Nose with Makeup- Step by Step Tutorial (10)

For more tips and techniques, follow us on a Facebook page and website. Stay tuned with us.

See More As:

read more
Beauty Tips and Health FitnessSkin Care

How to Shape Your Eyebrows Properly at Home by Yourself

how to shape your eyebrows perfectly at home by yourself (9)

Eyebrow shape helps to enhance your appearance and flatter your face shape by framing your eyes. There are two types of eyebrows, first thick & second thin. If one has thick one, then she needs to tweeze them & if thin than fill them with the pencil. Here we are sharing most easy techniques how to shape your eye brows perfectly at home without going to parlor or salons.

how to shape your eyebrows perfectly at home by yourself (1)

How to Shape to Eyebrows in Best Ways at Home by Yourself- Ideas & Tips

Follow these easy and simple ways to shape your eyebrows perfectly at home with a little effort by yourself!

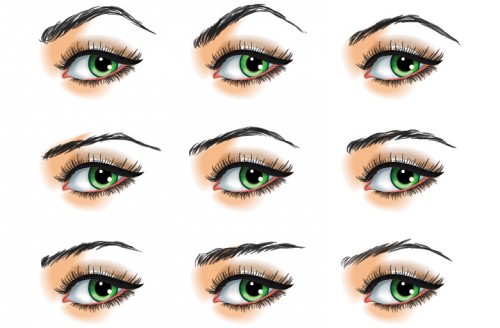
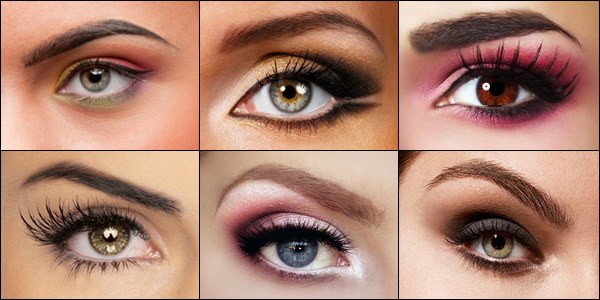
Different Eyebrow Shapes 

how to shape your eyebrows perfectly at home by yourself (4)

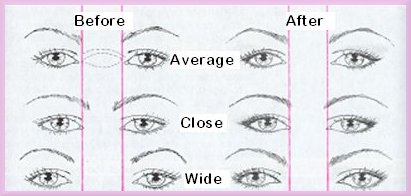
Determine the shape between eyebrows:

Check the space between your eyebrows so get know how much hairs are to be plucked to give a proper shape.

how to shape your eyebrows perfectly at home by yourself (8)

Determine the end of your inner brow:

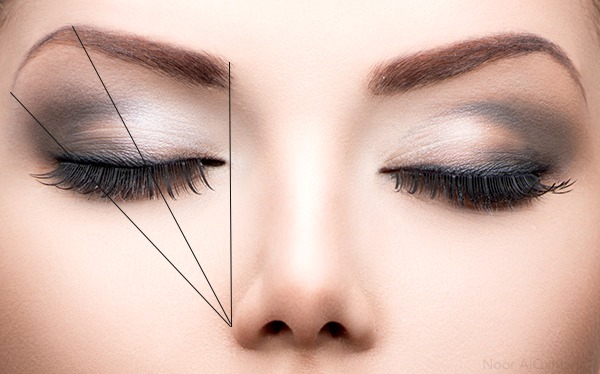
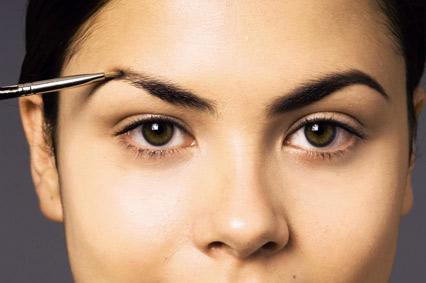
First of all hold a straight edge vertically in front of you. You can use eye pencil or a ruler. Then line it up such that it touches the outermost edge of your nose & the inside of the eye to determine the point from where your eyebrow should start. Put a mark on that point & repeat the same process for the second one.

1

Determine where your arch should peak:

Now angle the straight edge & line it up with the outermost edge of nose & the outer edge of the pupil of the eye. For this purpose, you are supposed to look straight keeping your face and eyes erect. At the top border where the line intersects the brow is the spot from where the peak of your arch will begin. Mark the point ad repeat for the other eye.

2

Determine the ending point of your eyebrow:

Continue angling the straight edge so that it touches the outermost edge of the nose passing along the outer side of the eye. Mark the ending point of your eyebrow with the eye pencil.

3

Line along the bottom edge:

To determine the brow thickness follow the natural curvature of the eyebrow.

how to shape your eyebrows perfectly at home by yourself (5)

Pluck the strays that fall below lie & outside marks made before:

Remember that eyebrows should be 0.5-1 cm thick, tweeze the stray hairs. If you want to retain your brow’s natural arch pluck minimally above the brow. For sensitive brow areas, it’s better to use ice cubes to numb the areas before tweezing.

4

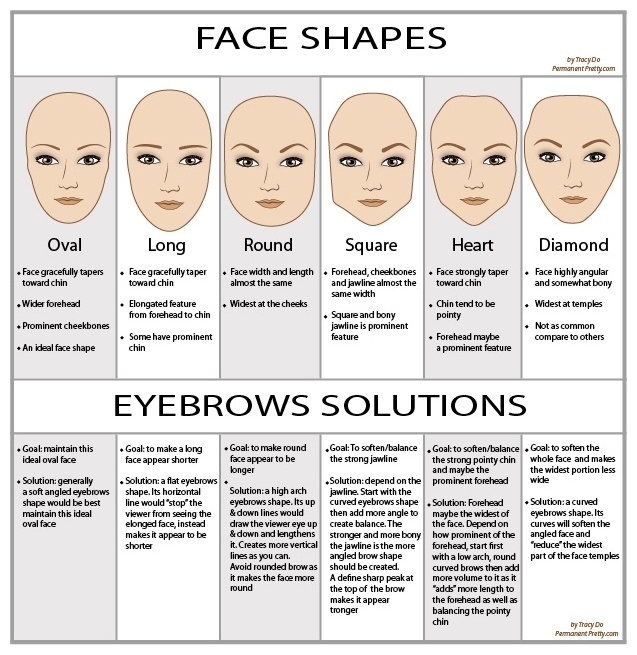
Always consider your face shape:

There is a role of face shapes in judging which eyebrow shape compliments your face more. For round face direct the outer third towards ear top & for square face direct towards ear middle. It will help to keep the balance.

5

Face Shapes & Eyebrows Solutions

how to shape your eyebrows perfectly at home by yourself (2)

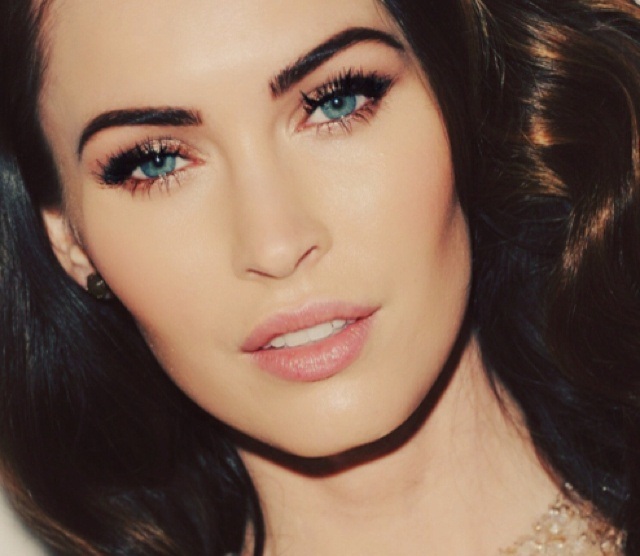
Perfect Eyebrows:

how to shape your eyebrows perfectly at home by yourself (3)

how to shape your eyebrows perfectly at home by yourself (6)

See More As:

read more
Beauty Tips and Health FitnessSkin Care

5 Must Have Makeup Items in Your Bag- Every Girl Should Know

5 Must Have Makeup Items in Your Bag- Every Girl Should Know (12)

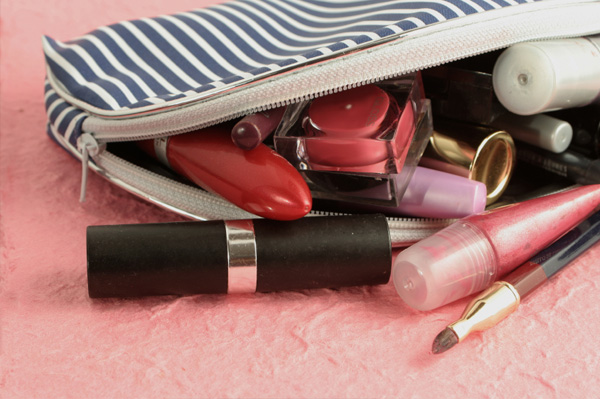
Every lady in the world desires to be pretty and workout to attain the appreciation. Women love to do make-up to look beautiful. A good makeup adds a glamorous look to an average face. If it is done poorly, then it can also destroy the charisma of a lovely face, so makeup matters a lot towards your looks. To all makeup lovers! Here are some of the essential beauty products that must own before going out. Yes! Your make-up bag must contain these necessary beauty items so whenever you need to fresh your face while staying outside; you can unzip your purse and revise your looks by using these beauty items.

5 Must Have Makeup Items in Your Bag- Every Girl Should Know (11)

5 Essential Beauty Items for Your Makeup Bag- Every Girl Must Know

So ladies! You should considered these basic make-up items while going on parties, tours trips or wherever outside. You must have these essential 5-beauty products in your purse. Let yourself know which they are. 

Makeup Bag Set
Makeup Bag Set

Eye Makeup Kit:

Your eye kit should include eyebrow pencil, eyeliner, eyeshadow, Kajal, and mascara.
Everyone love to have big eyes with prominent features. It is supposed to be the symbol of attractiveness. First make your eyebrows dark by using eye pencil. If you already have thick and dark eyebrows, then there’s no need to outline them. But if you have thin eyebrows you can prominent them by eyebrow pencil. Note: you must buy a well-branded eyebrow pencil so that it works well. You can make your eyes bigger by applying eyeliner and kajal smoothly. If you love doing makeup, then you can go with eye-shadow and mascara too. Well, eye makeup items are necessary to be included in your bag.

5 Must Have Makeup Items in Your Bag- Every Girl Should Know (6)

5 Must Have Makeup Items in Your Bag- Every Girl Should Know (5)

Skin Foundation & Concealer:

Foundation and concealer are the major items of your makeup kit. Every woman wants a smooth and bright face and struggle to achieve it. Make your skin tone even by applying a foundation base on the face. How is it applied? We have already discussed it. After completing with foundation use concealer. If you have dark circles beneath eyes, then hide it behind by using concealer. It can be applied to pimples, scars, spots, blemishes, etc. Finish up with a good base makeup.

5 Must Have Makeup Items in Your Bag- Every Girl Should Know (8)

5 Must Have Makeup Items in Your Bag- Every Girl Should Know (7)

Primer:

Primer is another major item of your makeup bag. If you have pores on your face, then apply primer on all the affected areas to even the skin tone and surface. It will hide you’re all tiny pores and make your skin soft and smooth. Primer is applied just after the foundation and concealer. It is applied to plain your skin surface to look perfectly good on a makeover.

5 Must Have Makeup Items in Your Bag- Every Girl Should Know (1)

Blush Tools:

Blush tools include blush colors kit and a brush. There are many women who love to do blush On. It prominent your cheekbones and make them visible. Applying blush on cheekbones gives an appealing rosy impact to your entire face. It is made for highlighting and contouring your face. No makeover is complete without having the flavor of blush. It tends to make your sharp edges look gorgeous as well as presents a more radiant look to you.

5 Must Have Makeup Items in Your Bag- Every Girl Should Know (4)

5 Must Have Makeup Items in Your Bag- Every Girl Should Know (3)

Lips makeup products:

It includes lip cosmetics like lipsticks, lip colors and lip glosses. They complete your entire makeup look. Select your favorite shades and place them in your bag so that whenever you go outside, and you need to get fresh then you can easily approach them. You must have three to four lipsticks in your bag so that you can utilize them at different times and days matching with your outfits.

5 Must Have Makeup Items in Your Bag- Every Girl Should Know (10)

5 Must Have Makeup Items in Your Bag- Every Girl Should Know (9)

See More As:

read more
Beauty Tips and Health FitnessSkin Care

Pastel Makeup Complete Tutorial with Detailed Steps

pastel makeup tips, ideas & tutorial with steps

Hello, Ladies, I hope you are having a wonderful day. Today I have amazing makeup tips and tutorials.Every girl wants to look perfect and gorgeous; this can be achieved easily by using the magic of makeup. Make-up gives you that complete and beautiful look, with a radiant finish. There are different types of makeup, some are for casual wear, and some are for weddings, parties, and special bridal’s makeup. Makeup products can be expensive, so it’s important to know how to use these products and make the most out of your money.
Makeup is a skill or art that can be learned. Practice makes perfect. And with some of the makeup tips and tricks I am about to share with you all will help you to do your makeup much more flawlessly. First of all, I would like to recommend some makeup brands, that are excellent, these include MAC, LOREAL, Origins, Ecco-Bella, Josie Maran, Dr. Hauschka’s, and Physicians Formula. These are some of the best brands of makeup in the world; these are high-quality products and will not damage or provide any harm to your skin in any way.

Step by Step Pastel Makeup for Face, Eyes and Lips: Complete Tutorial

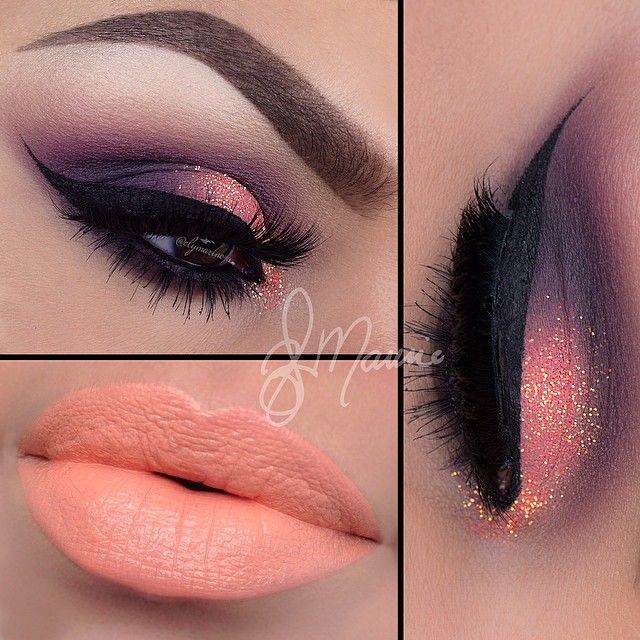
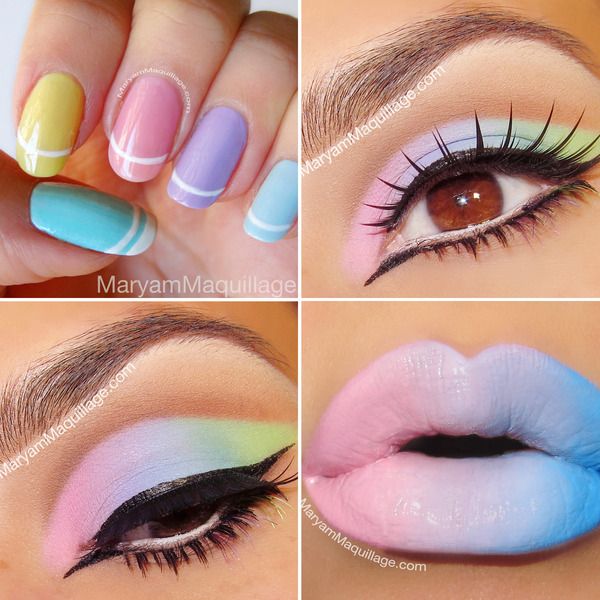
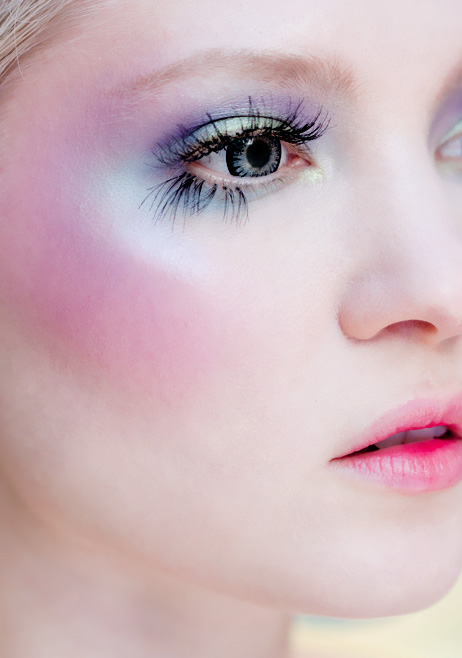
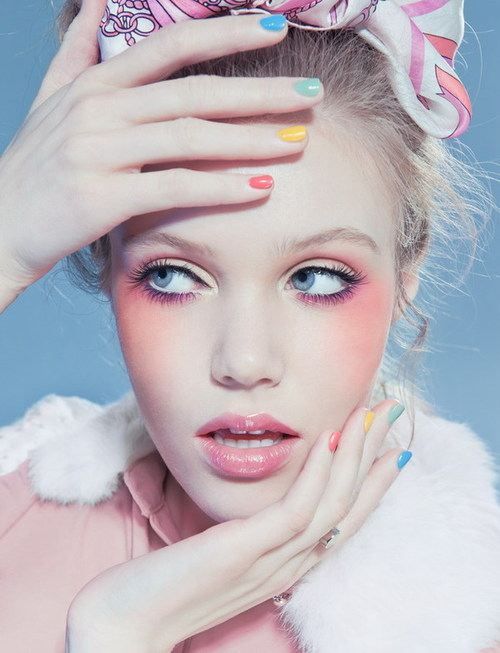
Today I’m going to discuss pastel makeup look that is one of the unique and soft looks. It will give you a flawless look that will complement your outfit; it’s perfect if you wear this during the day. Here is the detailed steps for pastel makeup with practical makeup techniques. Are you ready for your gorgeous look? Grab your make up a bag and follow the following steps.

pastel makeover looks (2)

Wash your face with Soap:

First wash your face with enough soap or face wash and dry it. If your skin is dry, then first moisturize your skin with lotion or a moisturizing cream, making your skin soft so that your skin is prepared for makeup all day. On the contrary, if you have oily and sleekly skin? I recommend a good face wash like Himalaya Herbals, The body shop’s face washes for oily skin, Olay, Neutrogena, and Oriyana.

Things you Need:

You will need the following cosmetics in your collection.

  1. Makeup base, Foundation, Concealer
  2. Blush (pink or peach)
  3. Bronzer.
  4. Eye base or a primer.
  5. An eye shadow palette.
  6.  eye pencil, white eye pencil, and black eyeliner.
  7. Black or brown mascara (lash curler is optional)
  8. Eye Shimmer.
  9. False eyelashes(optional)
  10. Soft colors lipstick kit.
  11. Makeup brushes or tools.

Base Make-up:

Let’s start with your concealer. Apply concealer gently to the darker areas of your face or pimples, now spread it or tap it with a sponge, or you can also do it with a makeup brush. Next, apply foundation with a foundation brush or sponge and set it with a face powder. Now apply primer on your eyelids. Now contour you face by using Bronzer then apply your blush. Your base is now ready. Next step is to create a perfect eye look.

pastel makeup looks (2)

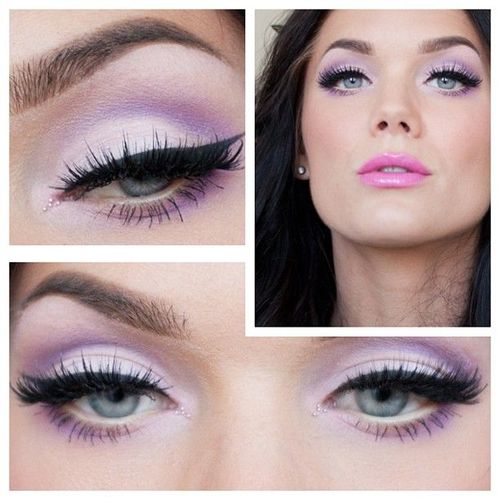
Pastel Eyes Makeup:

Eye makeup can work on every eye whether you’re old or young. Eye Primer is the best product before applying shadows on your eyelid. It covers freckles and veins, smoothing the creepy skin pretty well. By which, shadows can blend smoothly, giving a smooth palette for apply eye colors and making it last all day. Eye primer gives a younger look to older eyelids. Some of the best primers I would recommend are, Urban Decay original primer, smashes box photo finish lid primer, ELF shadow, Mac paint pot, and clean taste slate 360 creaseless smoothing primer.

pastel eye makeup tutorial  (2)

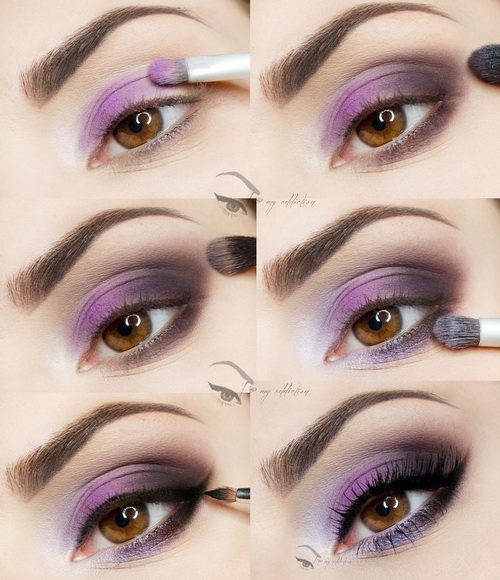
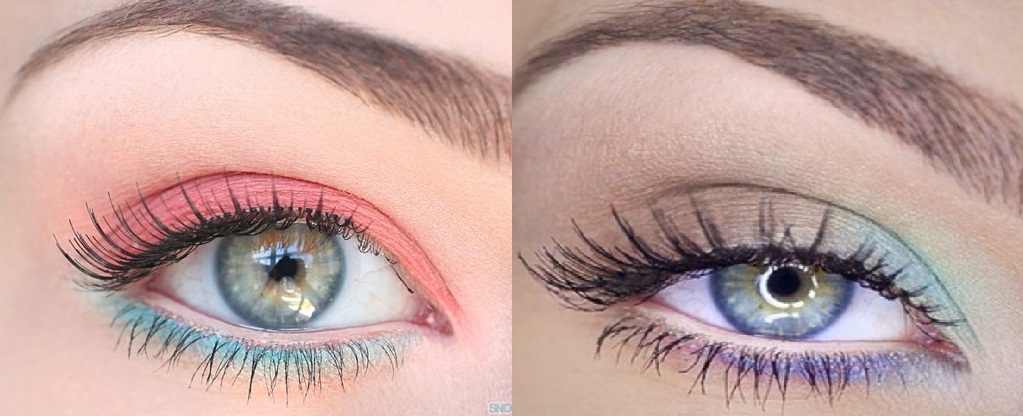
Tutorial to Create Pastel Eyes:

  • Apply a primer to your eyelid and tap it by using the sponge.
  • Use a light base shadow on your eyelid by using eye-brush blending it to the outer corners of your eyes. You can choose colors, coordinating with your dress.
  • Now blend creamy light brown eye-shadow on your whole lid. Here are some long lasting eye shadows which can you use, MAC eyeshadows, LO’real Paris hip studio secrets professional matte shadow due, Maybelline Newyork eye studio color, Urban decay and Jane Iredale pure pressed eyeshadows are some of the most famous eye-shadows.
  • Now in the middle apply the most prominent color in your dress like in the picture, I used a sky bluish color in the center.
    Now blend the sky bluish color towards the outer corner of your eye.
  • After then apply the brown, golden color from the starting of the lid and blend it till the middle of the eye.
  • Then apply a colored pencil below your lower eyelashes. (optional)
  • Apply white pencil inside your eye line.
  • It’s time to apply eyeliner and mascara.
  • In the end, sprinkle some shimmer on your eyelid, giving shiny and attracting look to your eye.
  • Repeat the other eye and you’re done with it.

pastel eye makeup tutorial  (1)

pastel eye makeup tutorial  (4) pastel eye makeup tutorial  (5) pastel eyes pastel eyeshadow colors

Pastel Lips Makeover:

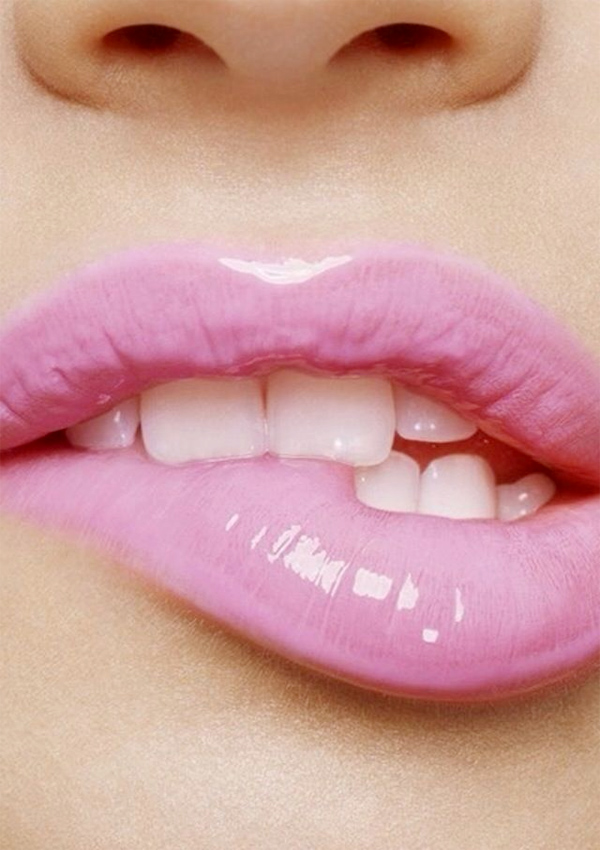
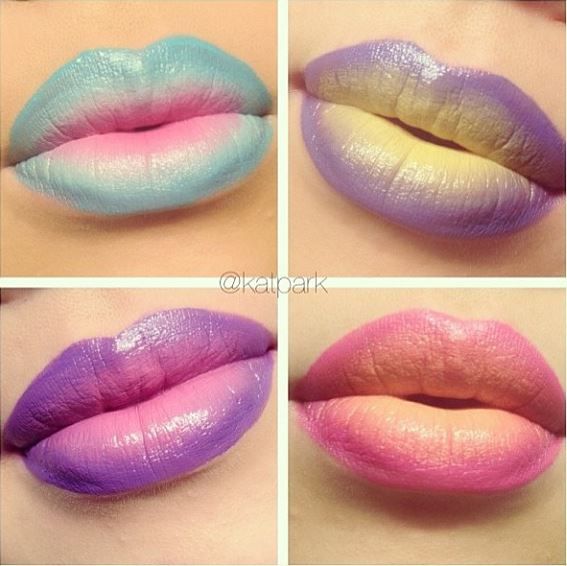
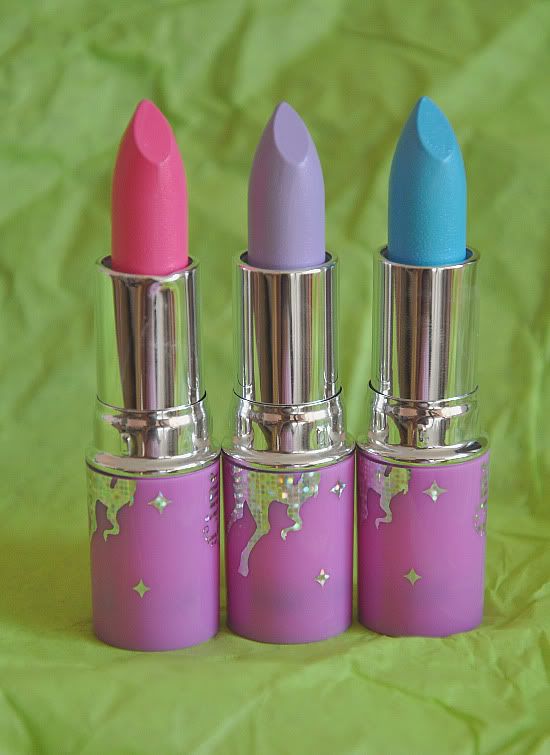
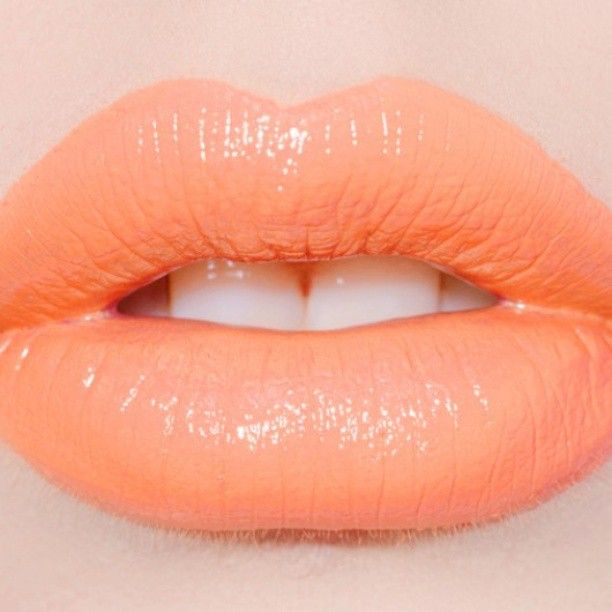
This is an important step to give a flawless finish to your makeup. Your makeup is incomplete without a lip color, this gives power and personality to your makeup. It depends upon the trend or seasonal fashion, sometimes dark lip colors are in and sometimes the soft lip colors or pastel colors are in, giving shine to your fashion style. Pastel color always gives the cute and sweet look to your face. Girls usually prefer pastel lip-shades during the summer, as it gives a refreshing look. Before you apply your pastel lip color, here are some techniques you may want to consider:

Pastel Lips-step by step pastel lip makeup (3)

Pastel Lips-step by step pastel lip makeup (1)

Tutorial to make Pastel Lips:

pastel color lipsticks

  • First use base to your lips. If you got dry lips, use lip balm or Vaseline to soften your lips.
  • Apply foundation or concealer on your lips.
  • Apply shiny or right color to your lips. I particularly like to use MAC lip colors, use orange or pink whatever color you want to apply.
  • Now apply some concealer, making your lips appear lighter in color.
  • Now add some gloss, making your lips soft and refreshing.
  • And there you have it, your lips are complete.

Pastel Lips-step by step pastel lip makeup (4)

Pastel Lips-step by step pastel lip makeup (2) Pastel Lips-step by step pastel lip makeup (5)

I hope that you find these steps quickly to follow. Use this tutorial to create your flawless pastel makeup and don’t forget to leave a review. We look forward to hearing from you. And if you want further pastel makeup ideas then see the following pictures.

Pastel Eyes and Lips:

pastel eyes and lips (2)

pastel eyes and lips (1)

Perfect Pastel Makeup Looks:

pastel makeup looks (6) pastel makeup looks (5) pastel makeup looks (4)

pastel makeup looks (1)

pastel makeup looks (7) pastel makeover looks (1)

See More As:

read more
Beauty Tips and Health FitnessSkin Care

15 Bridal Makeup Tips & Ideas Every Bride Must Know – Expert Advice

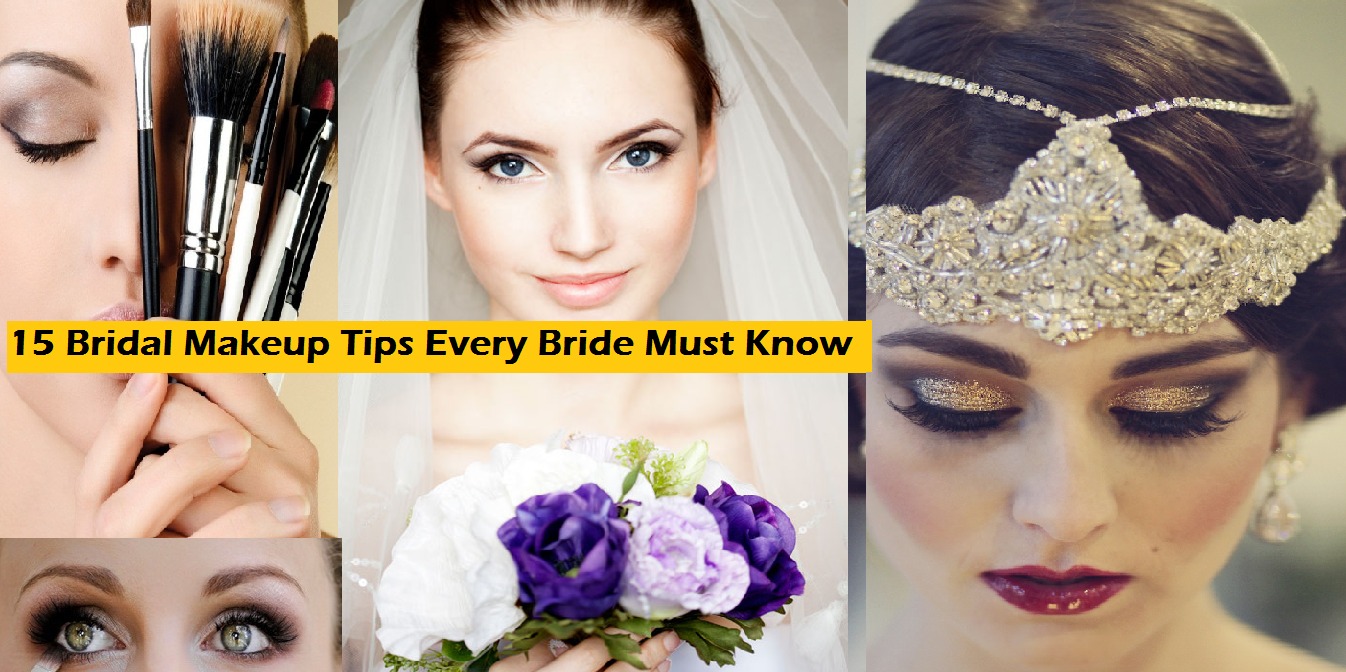
15 Bridal Makeup Tips Every Bride Must Know

Nowadays the weather conditions are regular these days not so hot or cold and so is regarded as perfect for wedding ceremonies in most of the part of the world including Asia, Europe, America etc. Whenever you walk about the weddings, Bride and groom both comes on our mind related to the bride other things like Bridal Dress comes along then how can we neglect the bridal makeover? The makeup can give an average bride a gorgeous look or may destroy the look of beautiful girl is it is held poorly. The wedding makeover defines the whole personality of a bride, if she has perfect outfit then the makeup must be fit and ideal. You have taken an appointment with a beauty saloon or planning to ready yourself own or whatever. But before all this you must know some important and basic bridal makeup tips and ideas that will make your looks stunning and flawless. Here we are sharing the expert advice with you gals so that you can easily opt all the essential guidelines to make your BIG Day more memorable and beautiful.

Basic Bridal Makeup Tips & Ideas that every Bridal Must Know - Expert Advice (8)

Basic Bridal Makeup Tips & Ideas that every Bridal Must Know – Expert Advice

  • Remember it’s your wedding, not girls’ night out. One of the biggest mistakes brides make is caking on makeup, too many layers of overly dark foundation, far too smoky eyes, lipstick that is blindingly bright in photos and so forth. And then they get embarrass when they look back on their wedding photos. Leave experimentation for another time and place its your wedding and you want to look like the best version of you, not like someone else.

Basic Bridal Makeup Tips & Ideas that every Bridal Must Know - Expert Advice (9)

  • Makeup artists highly recommend staying away from all makeup with any glitter or sparkle because it bounces off flash photography, leaving white spots on your skin. They can be removed from photos, but it’s expensive.

Basic Bridal Makeup Tips & Ideas that every Bridal Must Know - Expert Advice (11)

  • Make sure your makeup matches your hair and dress. Just as you don’t want to wear too much makeup, you also don’t want to wear the wrong style of makeup. Your goal is a cohesive look in which each piece makes sense with every other. Even if you love a certain style of makeup or are simply accustomed to wearing makeup one way, that doesn’t mean it’s going to look good with your hair and dress.

Basic Bridal Makeup Tips & Ideas that every Bridal Must Know - Expert Advice (10)

  • If your dress is romantic, billowy and soft, for instance, smoky eyes and bright red lipstick will be a disaster, not be complimentary.

Basic Bridal Makeup Tips & Ideas that every Bridal Must Know - Expert Advice (1)

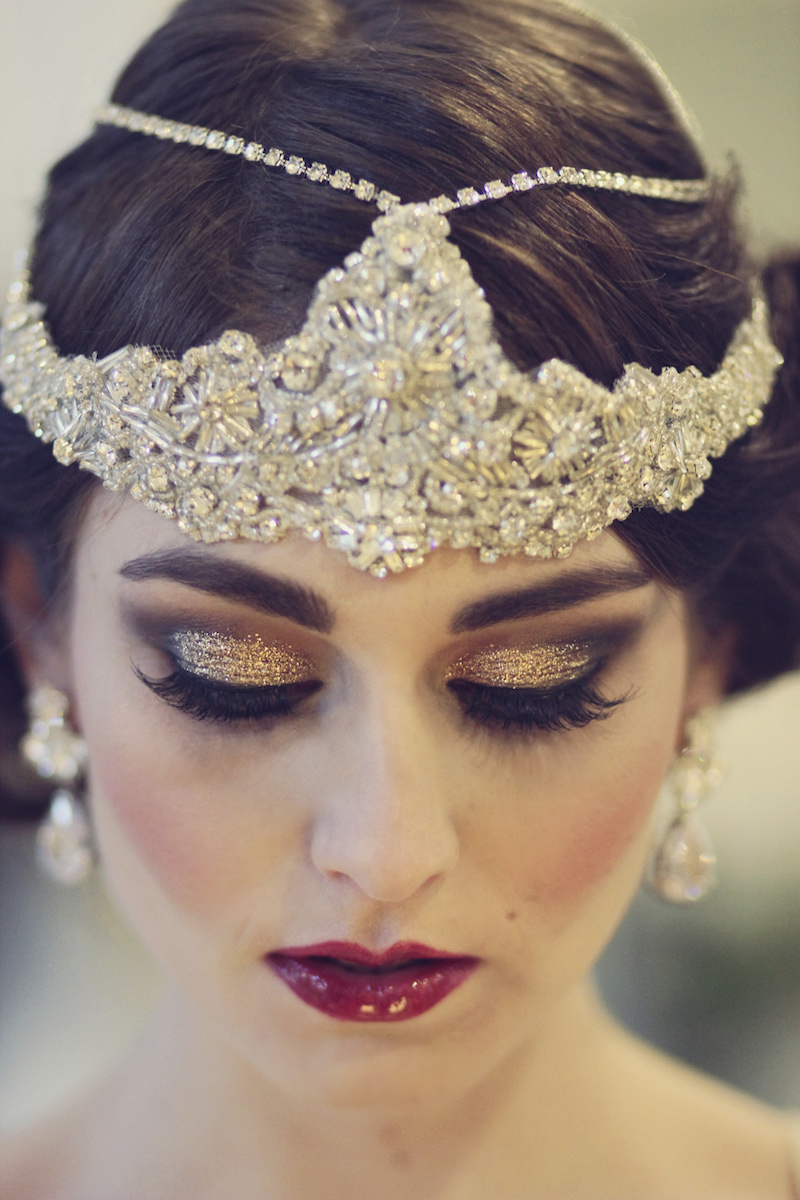
  • If you’re wearing your hair in an updo with a lot of adornments, you should keep your makeup simple, yet still fresh and rosy. It goes well on receptions.

Basic Bridal Makeup Tips & Ideas that every Bridal Must Know - Expert Advice (1)

  • Look at bridal magazines and red carpet images, specifically, to see how stylists put together an entire look that would develop a good sense and idea in you.

Basic Bridal Makeup Tips & Ideas that every Bridal Must Know - Expert Advice (2)

  • Collect images of looks you like.
  • Think about looks you’ve personally seen and liked.

Basic Bridal Makeup Tips & Ideas that every Bridal Must Know - Expert Advice (1)

  • Don’t neglect your skin. If you’ve not been taking good care of your facial skin, now is the time to start. Get facials once per month to firm your complexion and illuminate your skin, which will create a good base for makeup. Make sure you wash your face well not only in the morning but also at night to get rid of the day’s makeup. Regularly exfoliate to remove dead skin and even out your skin tone. Moisturize your face and drink plenty of water, too. Applying makeup to the dry, splotchy and flaky skin won’t produce your desired look, no matter how hard you try.

Basic Bridal Makeup Tips & Ideas that every Bridal Must Know - Expert Advice (5)

  • If you have a breakout a day or two before your wedding, do not pick at it! It’s much easier to cover a blemish than a scab.
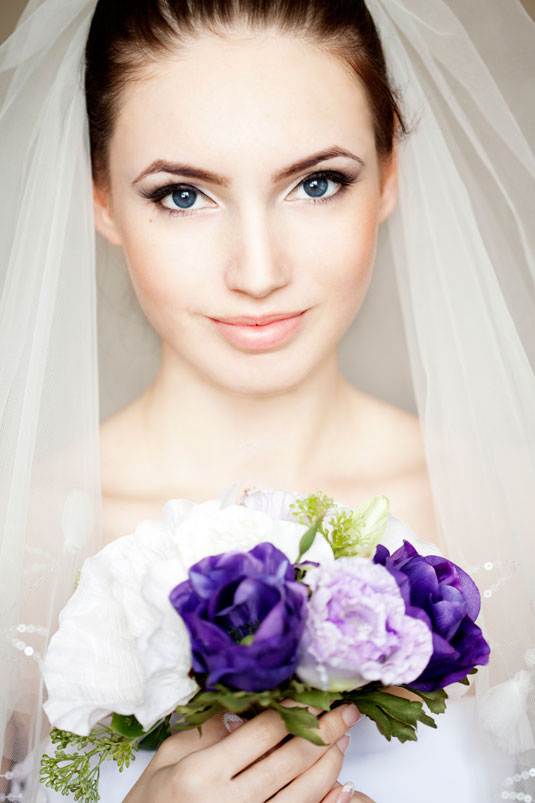
Beautiful bride outdoors in a forest.
  • Wax brows or other areas of your face at least one week before your wedding to avoid any marks. If you’ve never waxed before, don’t start doing so days before your wedding because you can get a rash if you’ve never before waxed.

Basic Bridal Makeup Tips & Ideas that every Bridal Must Know - Expert Advice (15)

  • Consider whitening your teeth, too. There are many options, from having it done at the dentist’s office to doing it at home with over-the-counter products.

Basic Bridal Makeup Tips & Ideas that every Bridal Must Know - Expert Advice (12)

  • Decide who will do your makeup. You may choose to do your makeup, or you may decide to have a friend or a makeup artist do it. If the latter, you may already have a recommendation from a friend. If not, consider asking your wedding planner if he or she can recommend one. You could also ask the coordinator of events for your wedding venue, look online or talk to the salon owner where you have your hair done or where you’re planning to have your hair done if you’re going that route.

Basic Bridal Makeup Tips & Ideas that every Bridal Must Know - Expert Advice (18)

  • No matter whom you select, ask to see a portfolio. If it’s heavy in everything but the look you want, find someone else.

Basic Bridal Makeup Tips & Ideas that every Bridal Must Know - Expert Advice (17)

  • Set up a trial run before the wedding. Don’t experiment the look on the day; check your complete look before to avoid the risk of any disastrous look.

Basic Bridal Makeup Tips & Ideas that every Bridal Must Know - Expert Advice (19)

See More As:

read more
Beauty Tips and Health FitnessSkin Care

11 Steps to Perfect Bridal Wedding Makeup Tutorial

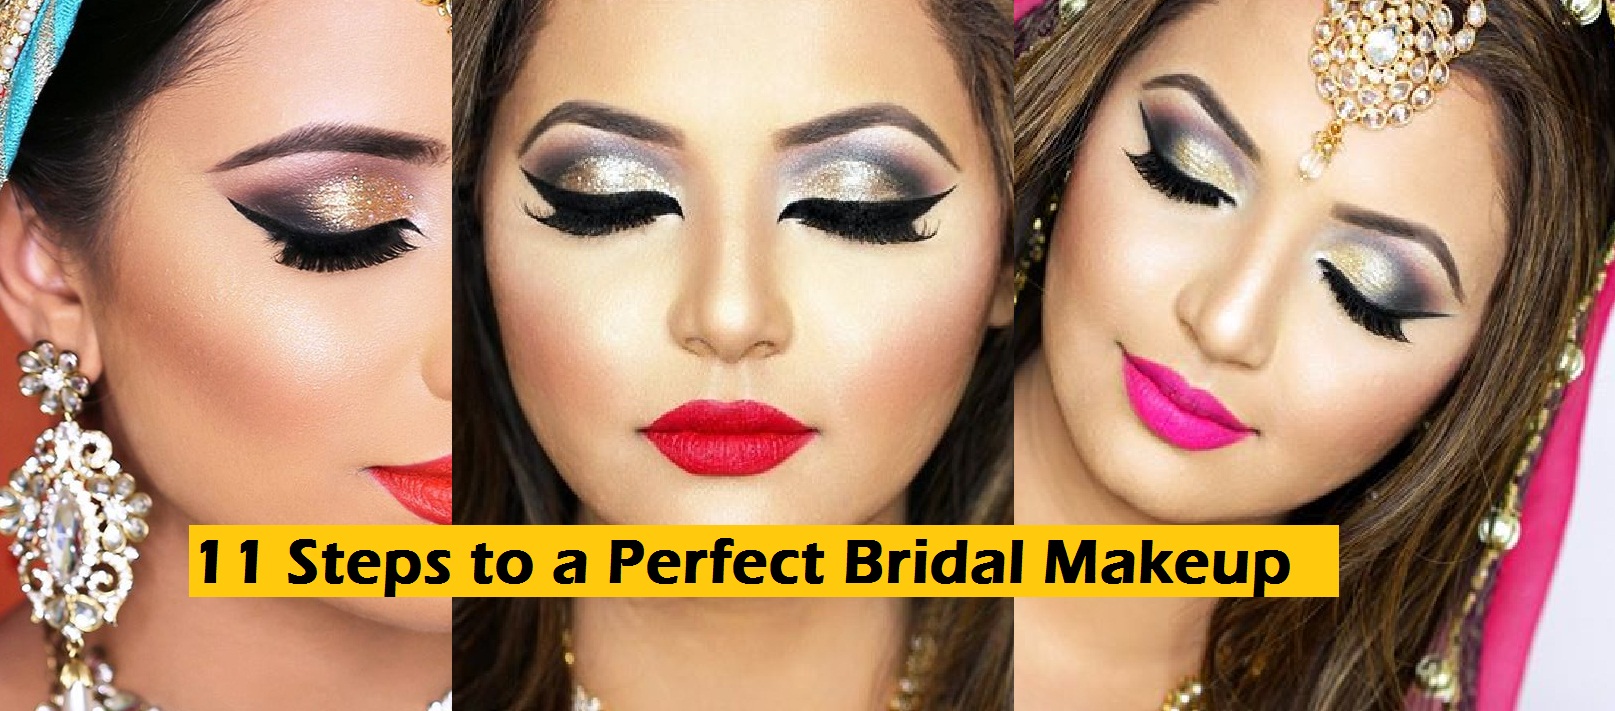
11 Steps to a Perfect Bridal Makeup

Neither too hot nor too cold, that’s why this season is considered best for weddings, in Asia. When we are talking about weddings then how can we ignore the bridal makeup? A poor makeup can destroy the charisma of an outstanding dress and even a beautiful girl. Whether you are going to parlor or not you must know the way how to do a bridal makeup, so that if you aren’t going to saloon you may do it yourself and if you are going to saloon then you could save your look. Its doesn’t matter whether you are Asian or European this tutorial will be ideal for you having any type of skin. For this purpose, her we are giving you a concise bridal makeup tutorial for Eastern including Indian, Pakistani, Egyptian, Arabian, Malaysian etc as well as Western brides like American, Italian, French etc.

Best & Most Easy 11 Step Complete Bridal Makeup Tutorial:

1# Preparing Skin:

Prepare your skin. Whether you’re doing your makeup yourself or not, the day of your wedding, wash your face and use a light moisturizer. Whatever your routine has been now being not the time to change it. If you exfoliate, however, stay away from a harsh scrub and use a gentle exfoliating cleanser. If you have a blemish, dab some Visine on it but otherwise leave it alone. Your focus should be on having the clean and soft skin, your makeup needs to achieve natural-looking, beautiful skin.

Preparing Skin for Makeup-1

2# Choosing the Right Makeup:

  • Let your skin tone and undertone guide your makeup color choices. While there are specific skin types, makeup companies use their terminology to describe their makeup colors along the continuum of skin tone. And they aren’t particularly consistent at that. For example, one company might call its lightest foundation “ivory” while another calls the same color “fair.” Thus, in thinking about colors that match your skin tone, it’s best first to think broadly in terms of the range from “fair” to “medium” to “deep.”
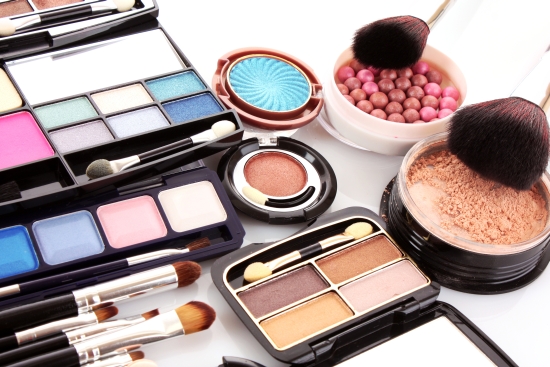
Many professional cosmetics for make up
  • Your skin’s undertones, cool or warm – are also a factor when choosing both matching and complementary colors.

Choosing the Right Makeup

  • You can determine your undertone with a quick trick. Hold a piece of silver and a piece of gold jewelry to the back of your hand. If the gold seems to melt away, you have a warm undertone. If the silver does, you have a cool undertone.

3# Applying Primer:

Know that primer is required. Between the time you begin applying your makeup and the time you say goodbye to your guests, a lot will have happened. Using a primer before you apply your makeup will help ensure it holds up through the dancing, crying and toasting. You’ll likely still need occasional touch-ups, but they’ll be much less frequent. Additionally, a primer will help smooth fine lines and wrinkles and disguise open pores.
Use a small amount after you’ve moisturized, but before you put on a foundation. Spread it evenly on your face and eyelids to create a smooth base for everything to come.

Applying Primer-1 - Copy

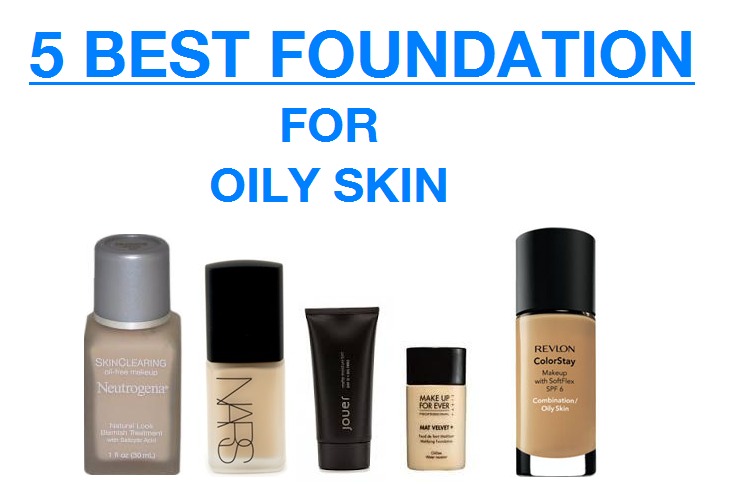
4# Put Foundation:

  • Apply foundation next. Often people think concealer goes on before foundation, but the experts say different. After you’ve put on the primer, allow it time to dry or set. One of the biggest mistakes you can make when applying makeup is not giving each step time to dry. If needed, turn your hair dryer on its coolest setting and wave it back and forth across your face before moving from one step to the next. But it’s not a very good idea for Asian skins.

foundation maekup


Foundation for All Skin Tones:

  • If you have a cool undertone, look for the foundation that has a rosier, redder or blue base.
  • If you have a warm undertone, use a foundation with a yellow or golden base.
  • To determine if the shade is right, dip a Q-tip in the foundation and apply it to the center of your lower jawline. If it vanishes, it’s the right one!
  • Apply foundation in thin layers, starting from the middle of your face and blending outward using a foundation brush. You don’t want any visible lines, so pay close attention to blending beneath your jaw and on your neck.
  • Don’t cake on foundation. It will look overdone and likely smear or streak.
  • Also will destroy your photographs.

Applying foundation - Copy

5 Best Foundations for Oily Skin - Copy

5# Applying Concealer:

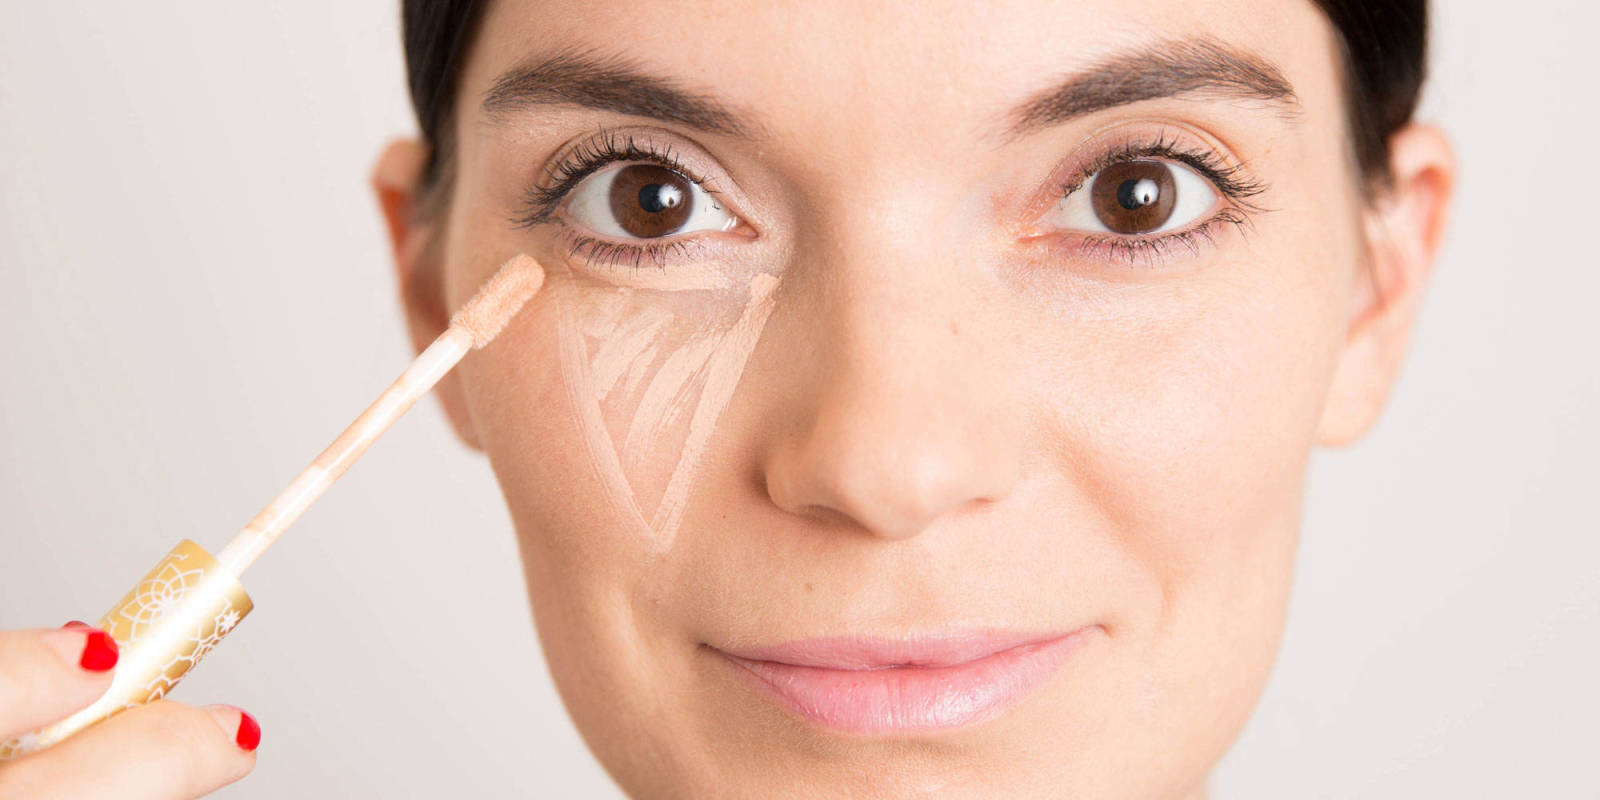
  • Add concealer where needed. Foundation is designed to even skin tone; concealers are designed to hide things, like blemishes and dark circles under your eyes. If you were to apply it to your foundation, you’d rub much of it away while working the foundation into your skin. To cover red areas or dark circles, use a concealer brush to dot a liquid concealer the same shade or one shade lighter than your skin tone along trouble areas. Then pat the brush against your skin to spread the concealer. If it’s not blended enough, dip the tip of a makeup sponge in water and work the concealer outward.

Applying Concealer

  • To hide a blemish, put foundation on it first, and then apply concealer before setting it with powder. If you can still see it, add more concealer and powder. Make sure you pat the concealer on the blemish. Don’t rub.

Applying Concealer on eyes and cheekbones

6# Go for Highlighter & Bronzer:

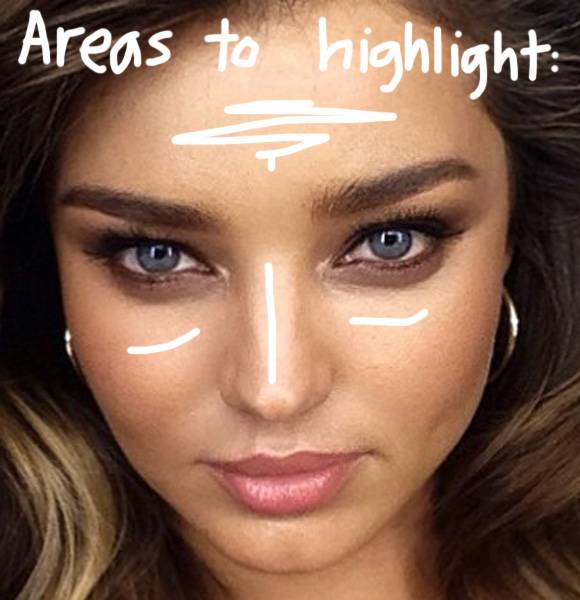
  • Apply highlighter, but go easy on it. Highlighter isn’t always in everyone’s makeup bag, but its purpose is to make certain facial features like eyes appear larger and to add both glow and a youthful, dewy look. Using too much, or a formulation with sparkle or glitter, is a recipe for photo disaster, so treat lightly. They come in both liquid and powder forms.

areas to highlight - Copy

  • If you use a liquid, dab it on with a brush after your foundation in the shape of a check mark. Start near your inner eye, go down at a slight angle toward your nostril and then up your cheekbone, blending toward your temple. Do the same above your brows, down the center of your nose, the center of your forehead and your chin.

how to apply bronzer

  • If you’re using a powder highlighter, use it after your powder and brush it under your brows, lightly in the corner of your eyes and on the tops of your cheekbones. Don’t use powder highlighter under your eyes or over your mouth or you’ll look sweaty in photos.

highlighting skin

7# Doing Base Contouring:

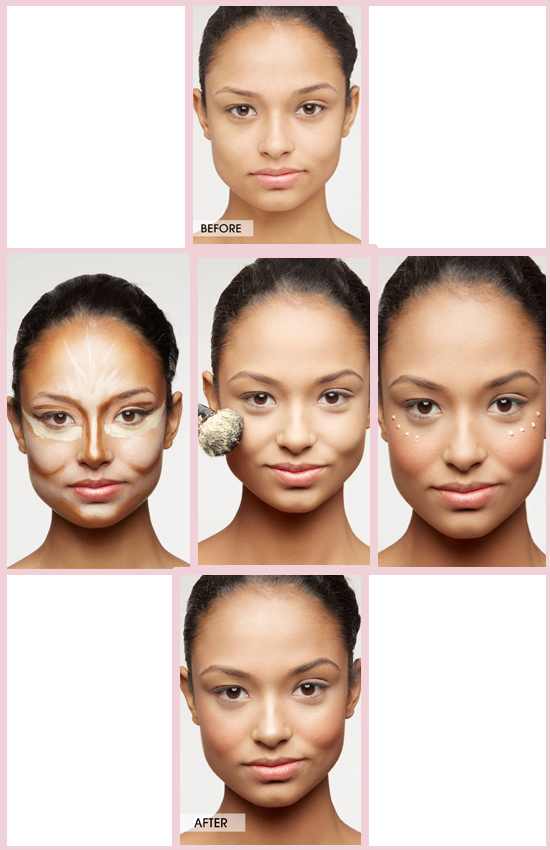
  • Set your base and then contour. You can use a cream blush rather than a powder blush or set your base with powder. If you opt to use a powder blush, first use a translucent powder to set your base and control shine. The powder is one of those times when less is more. You’re going for luminous, not laden down. Use a medium-sized brush to dust lightly over your forehead, the sides of your nose and on your chin.

perfect contouring

  • Then use a powder bronzer that’s just a shade or two darker than your foundation and brush it in the shape of a three on both sides of your face.
  • To do so, start at your hairline, move down the side of your face and then under your cheekbone, back to the side of your face and then below your jaw.

applying highlighter and bronzer - Copy

  • Have pressed powder on hand. There are always areas that shine and need a quick dab before a photo or while in the restroom.

applying contouring makeup - Copy

8# Applying Blush:

  • Blush gently. Whether you’re using a cream blush prior to your powder or powder blush after, go lightly with the blush. You can always add more. Apply blush to the apples of your cheeks and blend upwards and out toward your hairline. You don’t want a pink nose, so don’t brush it there. To finish, do a small check mark at your cheekbones.

applying blush - Copy
If you have fair skin with cool undertones, colors like soft rose or baby pink with hints of mocha or beige will look nice.

Bush Makeup for All Skin Color Tones:

  • If you have fair skin with warm undertones, go for golden apricot or a light peach with a bit of pink.
  • If you have medium skin with cool undertones, try cranberry, light raspberry or rosy pink.
  • If you have medium skin with warm undertones, look for soft coral with hints of brown or sun-kissed apricot.
  • If you have deep skin with cool undertones, blush on shades of plum, grape, and raspberry.
  • If you have deep skin with warm undertones, keep it rich with brown suede or a deep coral with a little bronze.

perfect blush makeup

9# Making Eyes Look Bigger & Prominent:

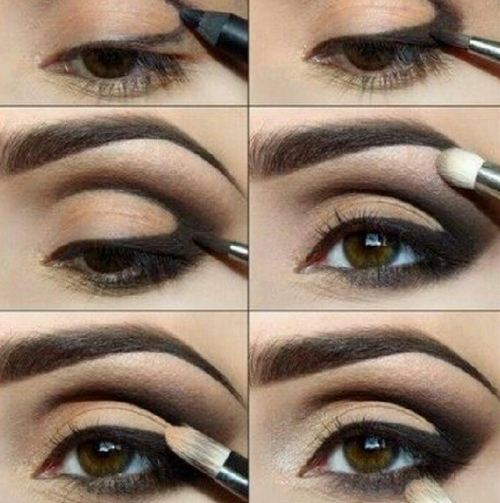
  • Bring color to your eyes with shadow and liner. Wedding experts generally don’t recommend a darkly dramatic eye, opting instead to use eyeliners in colors other than black, paler or muted eye shadows complementary to your eye color, and highlighters to make eyes look large. Try brown, gray, and green eyeliners and apply it to both your top and bottom eyelids to draw attention to your eyes. Using a cream eye shadow will last longer and is best used on the lids of your eye while a powder is best in the crease of your eye. Use a powder highlighter in the corners of your eyes and under your brow.

making eyes look bigger
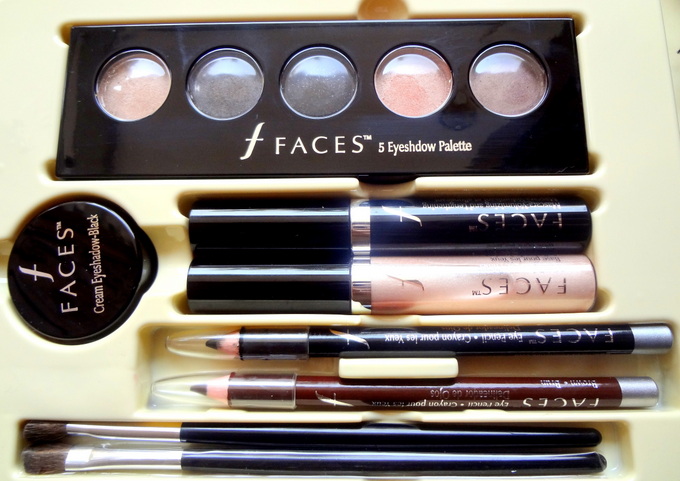
As for colors, try bronze shades if you have green eyes, mocha if your eyes are hazel, navy and dark brown for blue eyes, and purples and grays for brown eyes.

  • Dampen an eyeliner brush with water and brush it into your eye shadow if you want to line your eyes with your eye shadow
  • More will be listed in eye makeup tutorial.

making eyes look bigger-2

10# Doing Eye Makeup:

  • Add mascara and tidy up your brows. There likely will be tears more than once, so you must have waterproof mascara. Also, if you don’t already regularly wear false eyelashes, your wedding day is not the day to start. Instead, make sure you have a good eyelash curler, volumizing mascara and lengthening mascara. Curl your lashes before applying both. With your mascara, start at the root of your eyelashes and wiggle up from side to side to the top. Go with black – it looks good on everyone.bridal eye makeup (1)
  • Finish by framing your face with a brow powder a little darker than your natural color. Brush it into the natural line of your eyebrows, working outward to the end of your eyes.

bridal eye makeup (3)


11# Choosing Lip Color/ Lip Makeup:

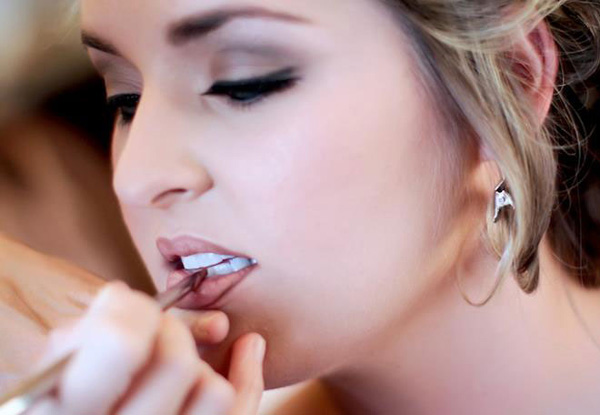
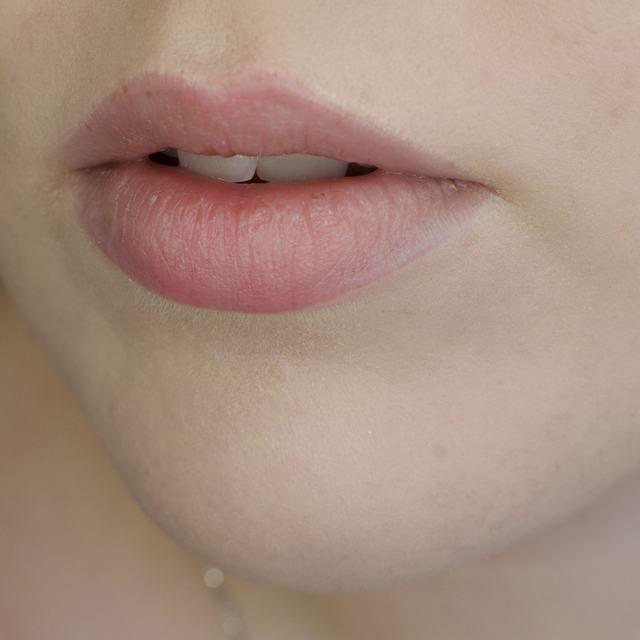
Create lips that look good and last. Just as you need your facial skin to be well moisturized prior to applying makeup. Your lips also need to be moisturized so they aren’t so dry or cracked that once color is applied all you see are lines. To avoid this, use a lip hydrator and let it absorb a couple of minutes before applying color. Choose a color that complements your blush while also following these tips. Also, while many newer lipsticks claim to last hours, going with a lip stain is a better bet on your wedding day.

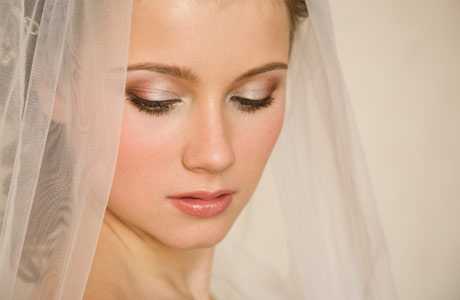
amazing bridal makeup looks (6)

amazing bridal makeup looks (7)

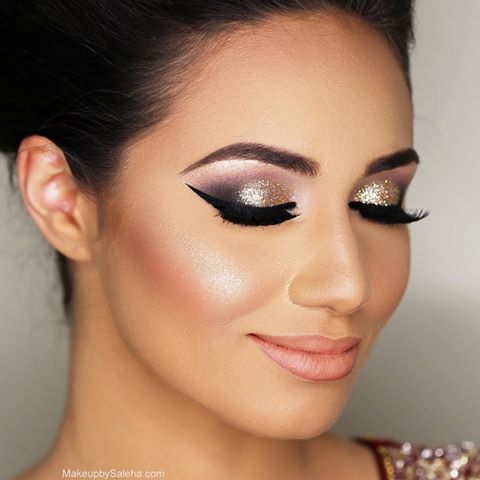
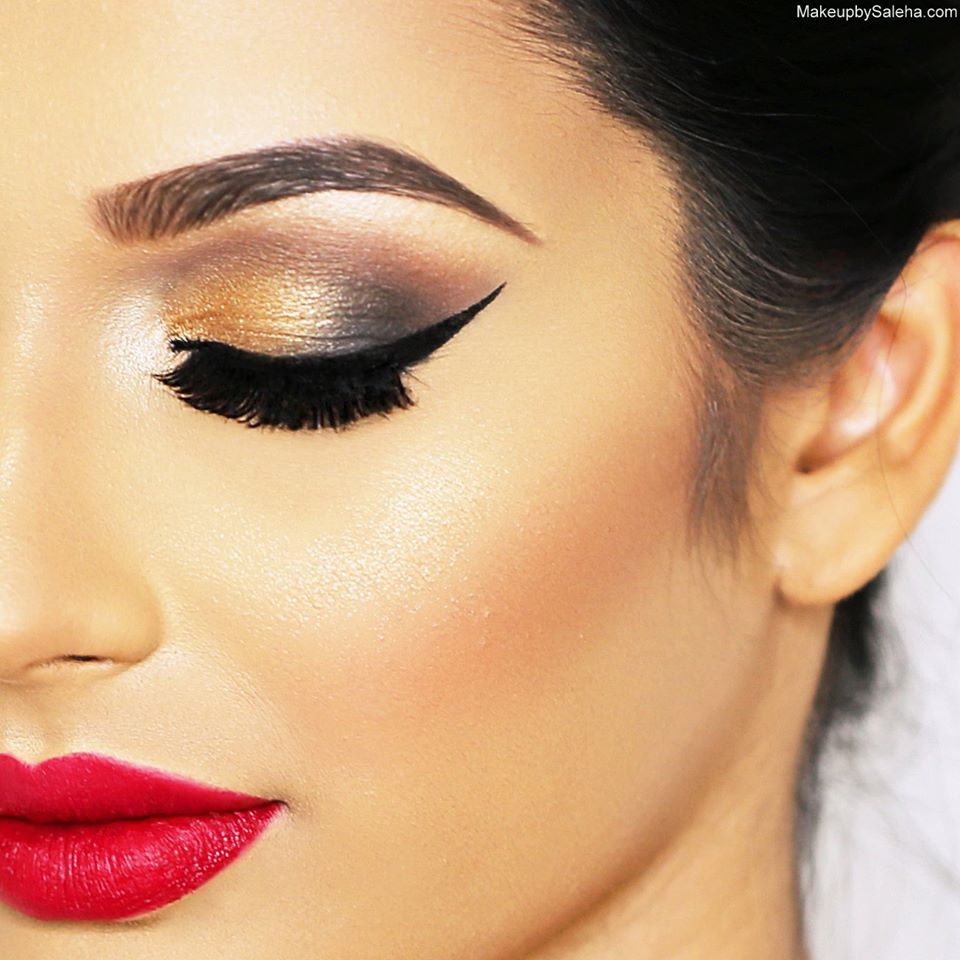
Amazing Bridal Makeup Looks:

amazing bridal makeup

amazing bridal makeup looks (13) amazing bridal makeup looks (12) amazing bridal makeup looks (11) amazing bridal makeup looks (10) amazing bridal makeup looks (9) amazing bridal makeup looks (8) amazing bridal makeup looks (4) amazing bridal makeup looks (3) amazing bridal makeup looks (2) amazing bridal makeup looks (2) amazing bridal makeup looks (1)

asian bridals (1)

asian bridals (2)

See More As:

read more
Beauty Tips and Health FitnessSkin Care

How to Reduce Pimples? 5 Best & Easiest Ways To Try At Home

5 best ways to treat acne-pimples naturally

Hey, teens! Not only teens but all you visitors including all males/ females are most welcomed here to this writing because it may be you or your friends who suffer from same embarrassment. Yeah, it’s the acne! Pimples, Oily hives, blemishes are all types if acne that now a day has become a hot skin problem. As in summer pimples, sun exposure, hot weather and many other things damage one’s skin; every second man, woman, teen girl, and boy are tired of having these issues and spending much of the money on dangerous solutions. Skin solutions in dermatological science are very expensive and in some cases very dangerous as well, especially when it comes to rapid action. Fast removal of acne is very dangerous and expensive as they may cause damage to the skin with the intensity of medication. But nor worries now! We’ve got the homemade acne remedies for you to get rid of it within a few days.

DIY: Top 5 Best & Easiest Ways to Reduce Pimples at Home/ Homemade Remedies

In every kitchen and every home, there are a few astringent Ingredients that we can use as an enemy against pimples. So everyone, let’s explore a few of them below.

Using Ice Cubes:

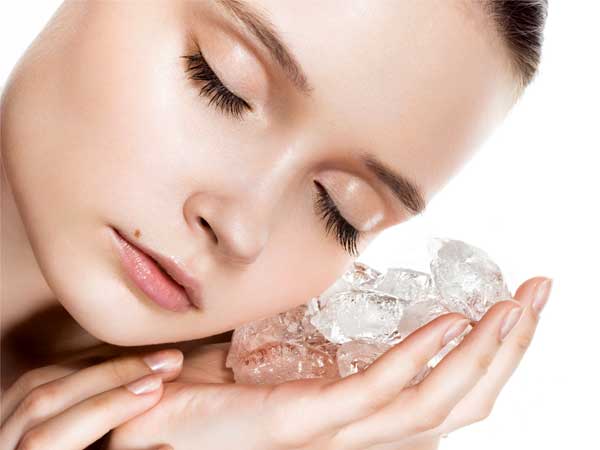
  • Use Ice cubes for the reddened acne. Yes, if you have redness, inflammation of swelling of your skin, the best way to get relief is to rub regularly an ice cube over the acne until you feel it lessened. Let your skin get warm again by itself. This way you will reduce your pain, itchiness and the size of pores by tightening the blood vessels as this is the most confirmed home remedy to lessen the acne within few days. You can also make ice cubes of rosewater and then rub them over your pimples.

applying ice cubes to reduce pimples

By Applying Fresh Tomatoes:

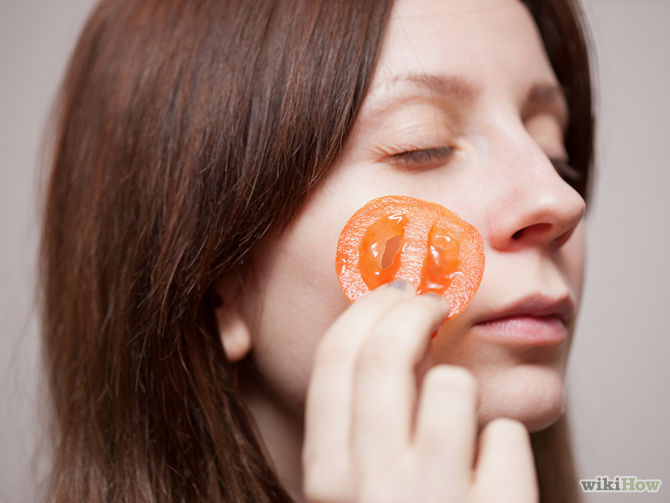
  • Another way is to use Tomatoes have in them the natural acid that is very good for breaking down the wall of pimples and for removing acne in a few days by fighting the bacteria sitting in the pores of your skin. Simply Applying one-half of it on one side of the face and another half on another side would go fine in aiding your acne.

applting tomatoes to pimples

Tea Tree Oil:

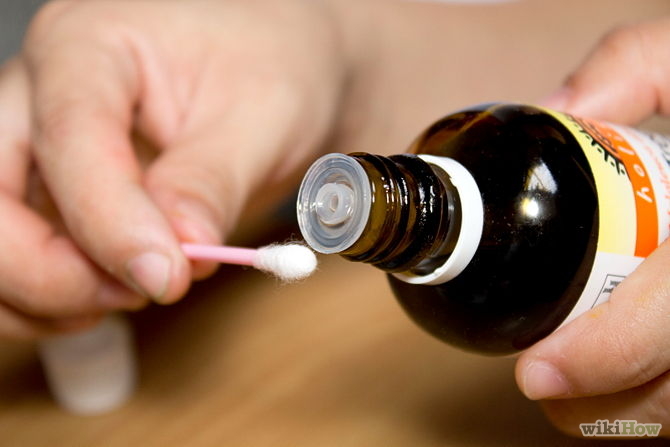
  • Tea tree oil, a perfect natural antiseptic ingredient that kills the germs. All you need to do is to use a dropper and apply the tea tree oil over your pimples with the help of it but remember, don’t place on too much of it. This way the size of pimples would be reduced evidently.

applying tea tree oil on pimples

Aspirin Tablet:

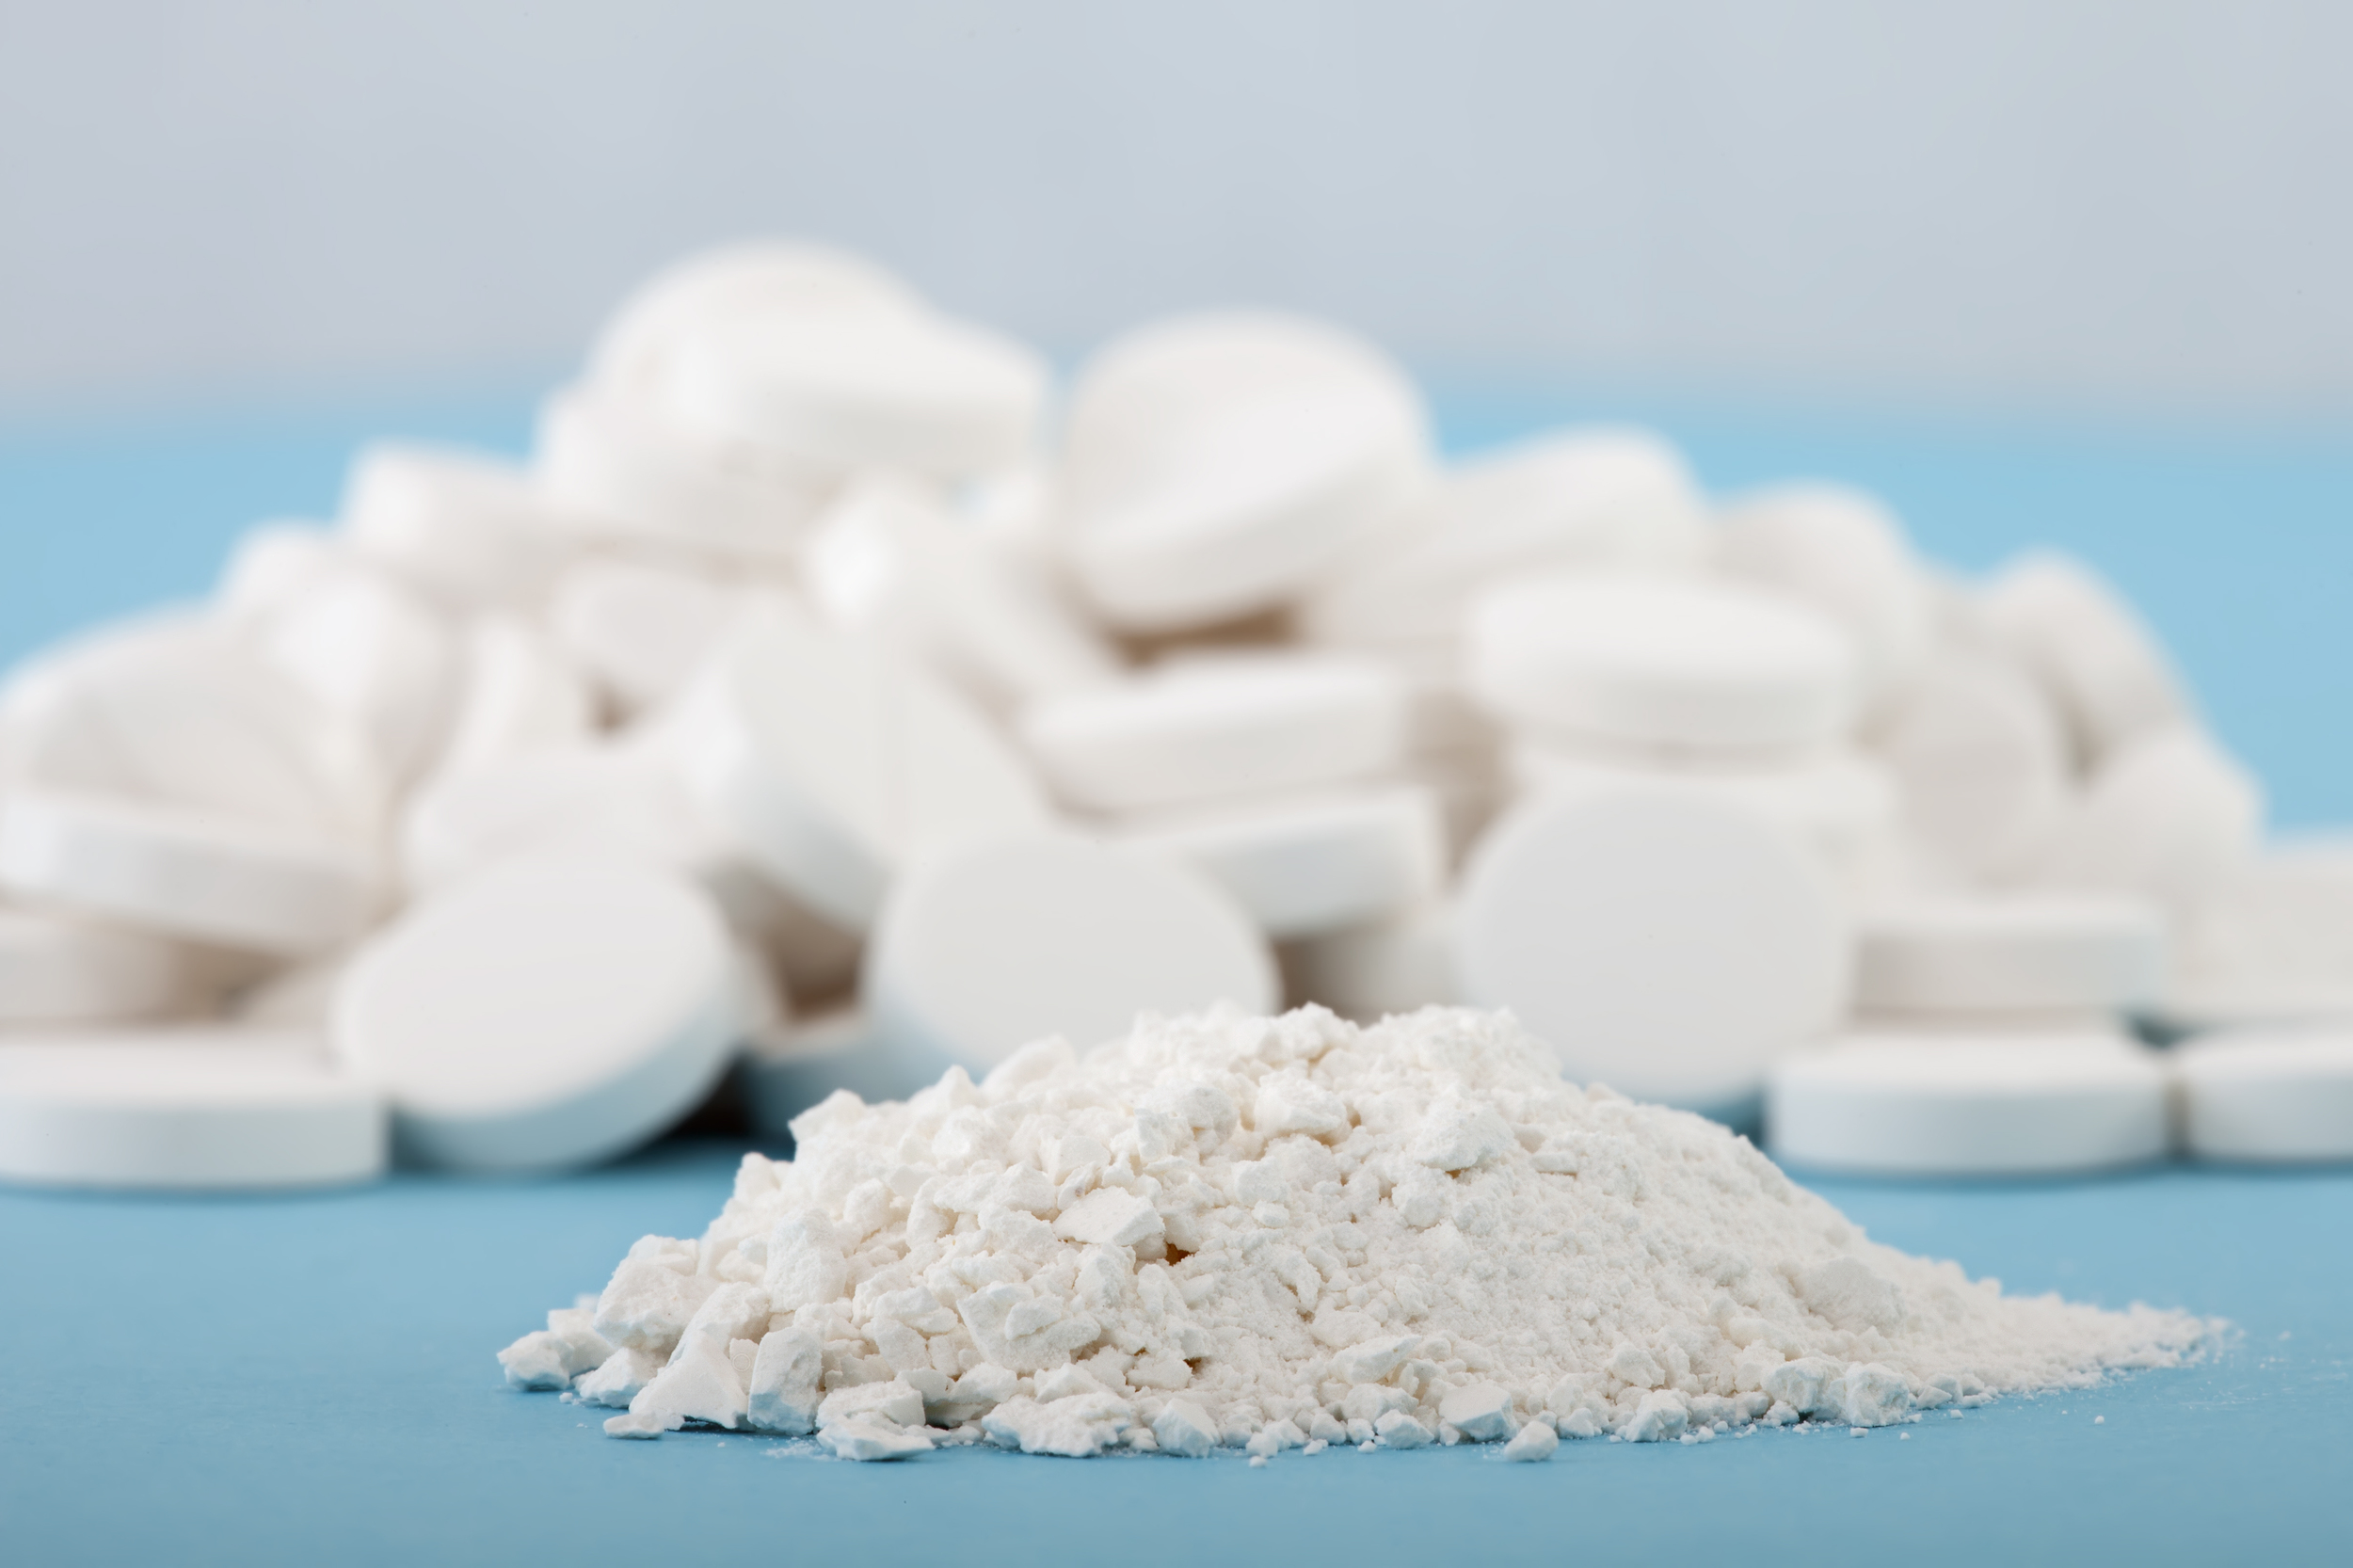
  • Crush up some aspirin! What? Don’t believe it? Crush up an aspirin tablet and add little amount of water to make a paste and apply this over the pimple. Let it rest overnight and then you’ll believe the Aspirin’s property of fighting the redness.

crushing aspirin to reduce pimples-acne

Toothpaste:

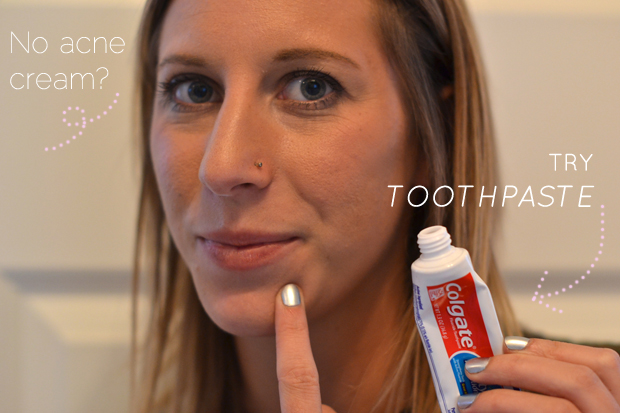
  • Another way to reduce pimples is to use toothpaste over them.Toothpaste as the drying agent would help drying out your acne but remember! Don’t use it over sensitive skin and Make sure to use natural toothpaste for this purpose.

applying toothpaste to pimples

These five ways are the top rated acne remedies for fast reduction of it. Following are some other natural and easily available ingredients that fight acne amazingly

  • Green tea
  • Crushed garlic paste.
  • Apple cider vinegar
  • Honey
  • Lemon juice
  • Salicylic acid
  • Rose Oil
  • Lavender oil
  • Turmeric

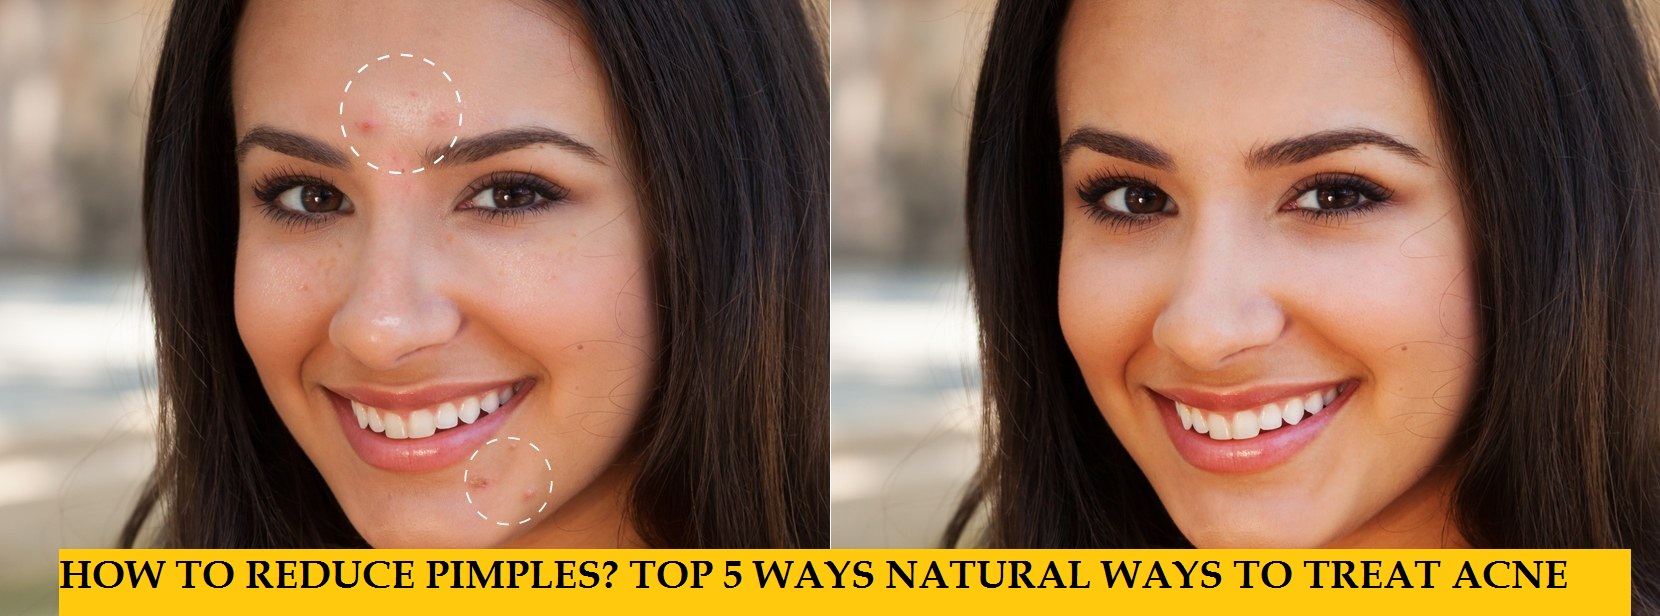
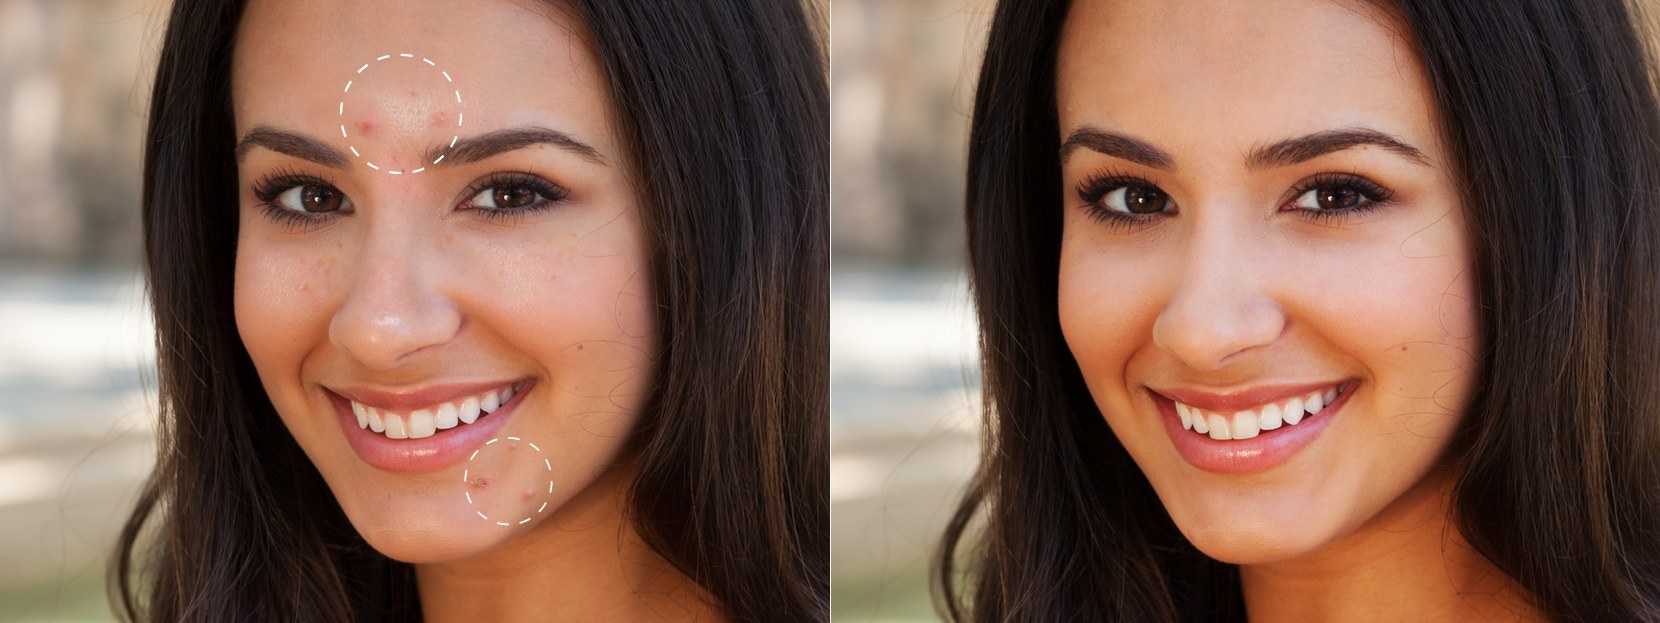
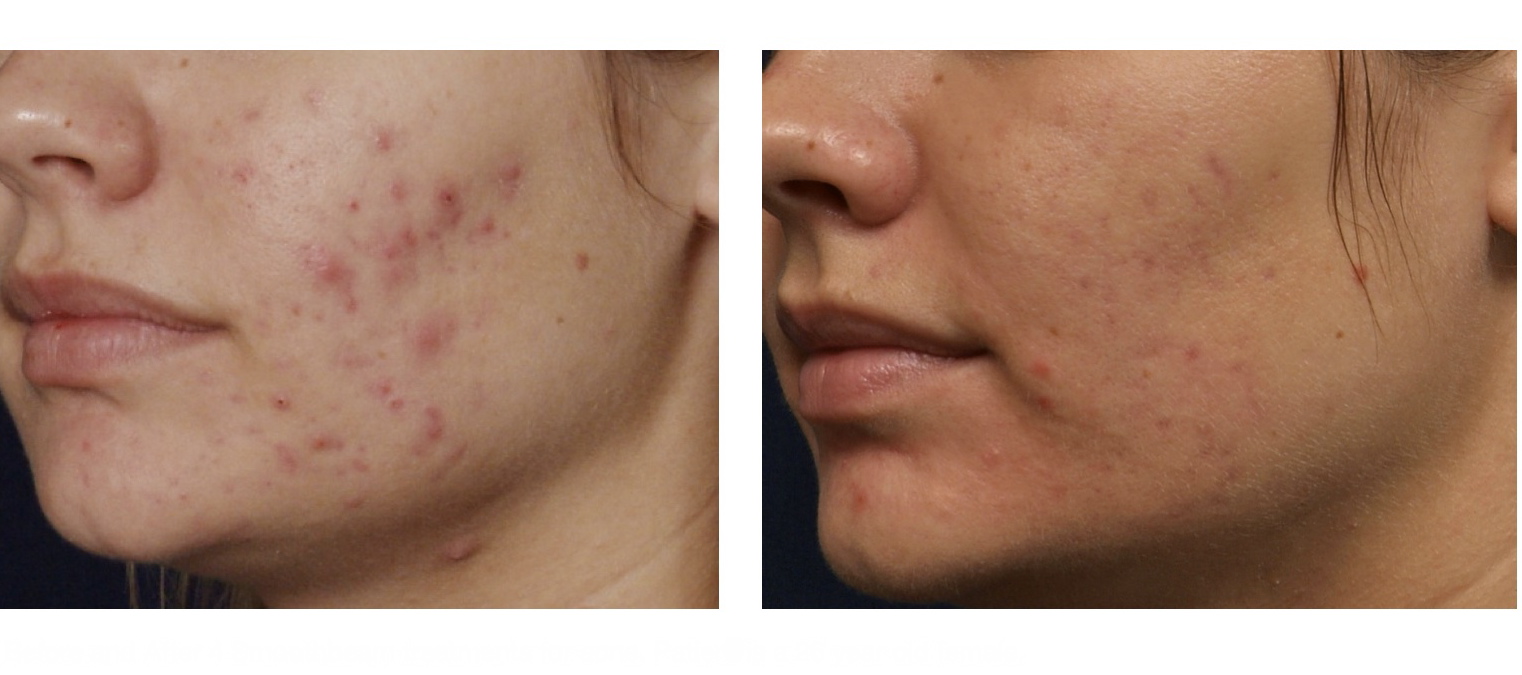
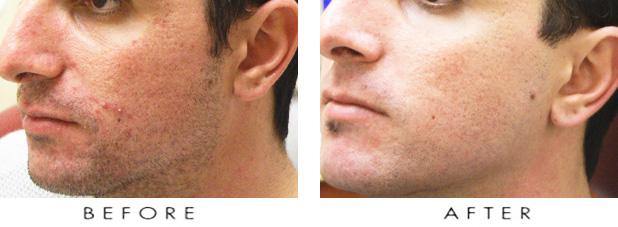
BEFORE & AFTER RESULTS:

5 best ways to treat acne-pimples naturally (3)

5 best ways to treat acne-pimples naturally (2)

5 best ways to treat acne-pimples naturally (1)

See More As:

read more
Beauty Tips and Health FitnessSkin Care

10 Best Natural Ways To Treat Grey/ White Hairs at home

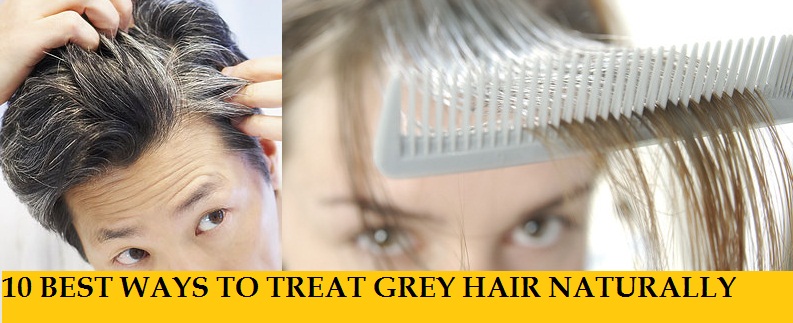
10 best ways to treat grey hair naturally

Not any of men or women is a fan of gray hairs that is becoming irritating problems among not only aging adults or old people but these days it has been increasingly found in youngsters too. It’s nature that our hairs have the tendency to go white with age but who likes it? Most of us take a hard time accepting this change. There are many chemicals for treating gray hairs, but all of them have side effects like hair fall, hair damage, can effect on eyes and dryness, etc. but there is no need to worry anymore because there are certain natural remedies that can help you delaying the process of hairs getting gray or white.

10 Best Ways to Reduce Gray Hair through Natural Remedies at Home

One should take balanced diet, vitamins, avoid stress and keep himself clean for all the before age happening factors, but apart from that let me just give you top 10 best natural remedies to treat gray or white hair at home that will help you keep your natural color:

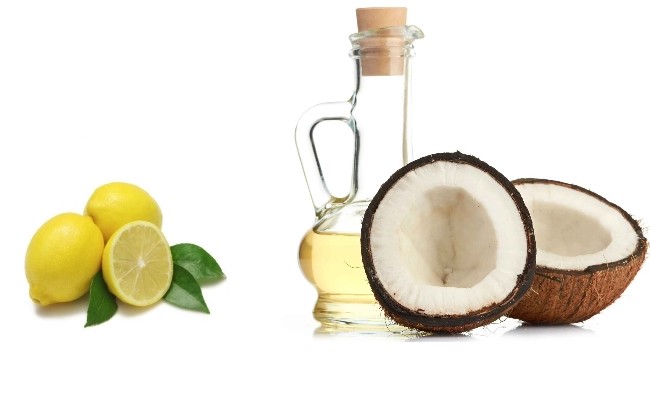
  • Coconut oil & lemon:

    Take some coconut oil with a dash of lemon, mix them both & massage on your head for 15 minutes approximately on the daily basis for better results. This procedure will not only fight against grays but also make your hairs strong, volumetric, and long and gives texture.

Coconut oil & lemon

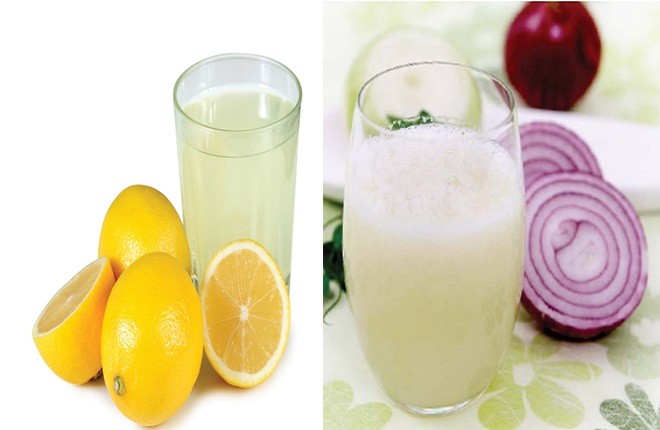
  • Onion juice or lemon juice:

gray locks by mixing barley grass or wheat grass with onion or lemon juice to form a paste. Then massage it on your head daily & you will get results in a very short time.

Onion juice or lemon juice

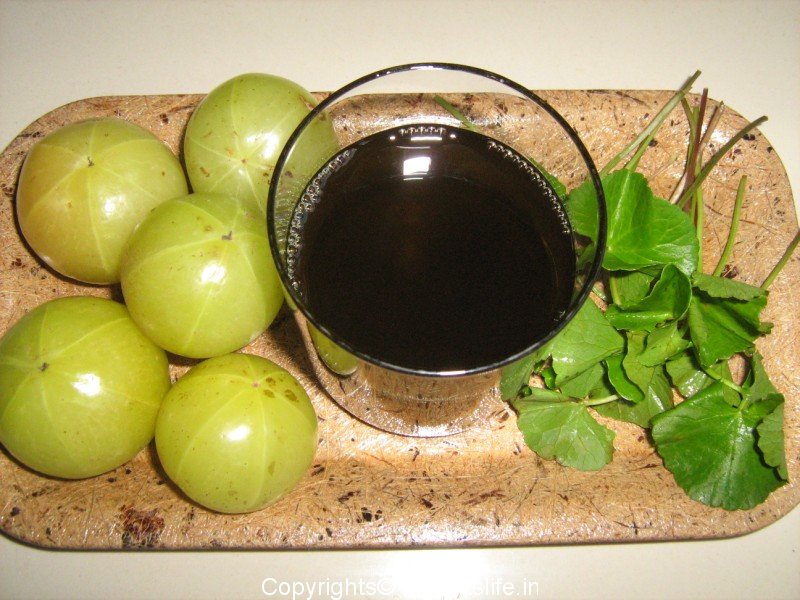
  • Amla:

Amla or Indian Gooseberry is a very famous treatment for all hair problems. Also, it can be used in various ways to treat gray hairs. Soak amla pieces for few hours & mix one spoon of eucalyptus oil. Now store this mixture in an iron jar overnight and next morning massage it with egg, curd and lemon juice on your locks. Another way is boil amla in coconut oil till it gets black than when cooled massage the mixture on your head.

Amla

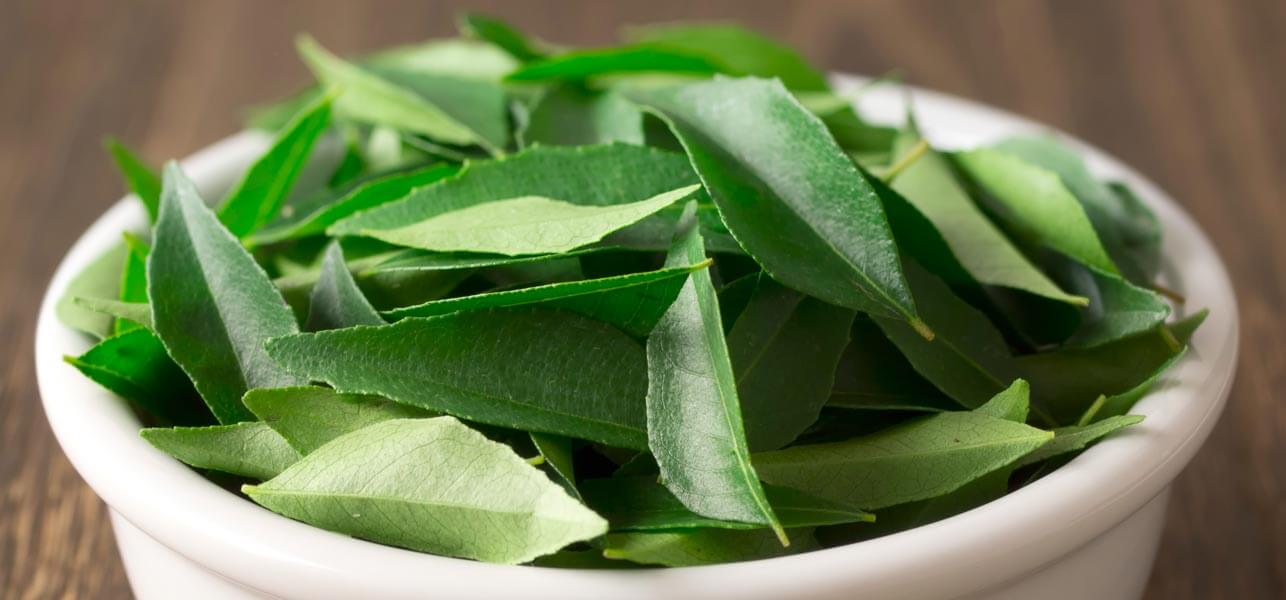
  • Curry leaves:

Curry leaves is another good natural treatment for gray hairs. Boil curry leaves in coconut oil and then apply it on your locks when cooled. It will nourish your hairs giving them black color.

Curry leaves

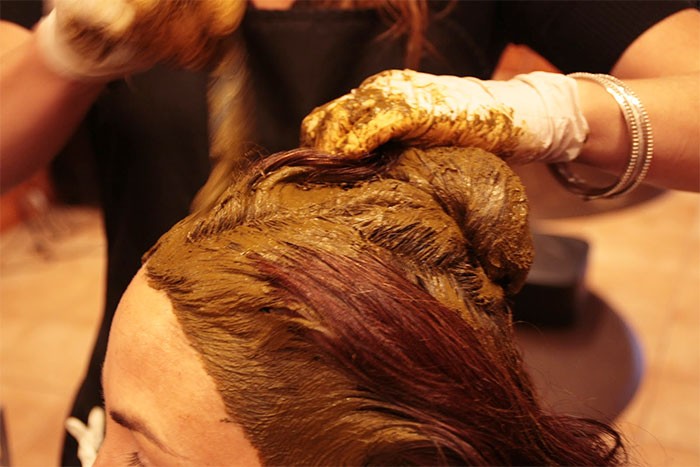
  • Henna:

Henna is the best and effective way to treat your gray locks. Mix it with castor oil and lemon juice & apply it. Now leave it for about an hour before shampooing it off your hairs.

heena for gray hair

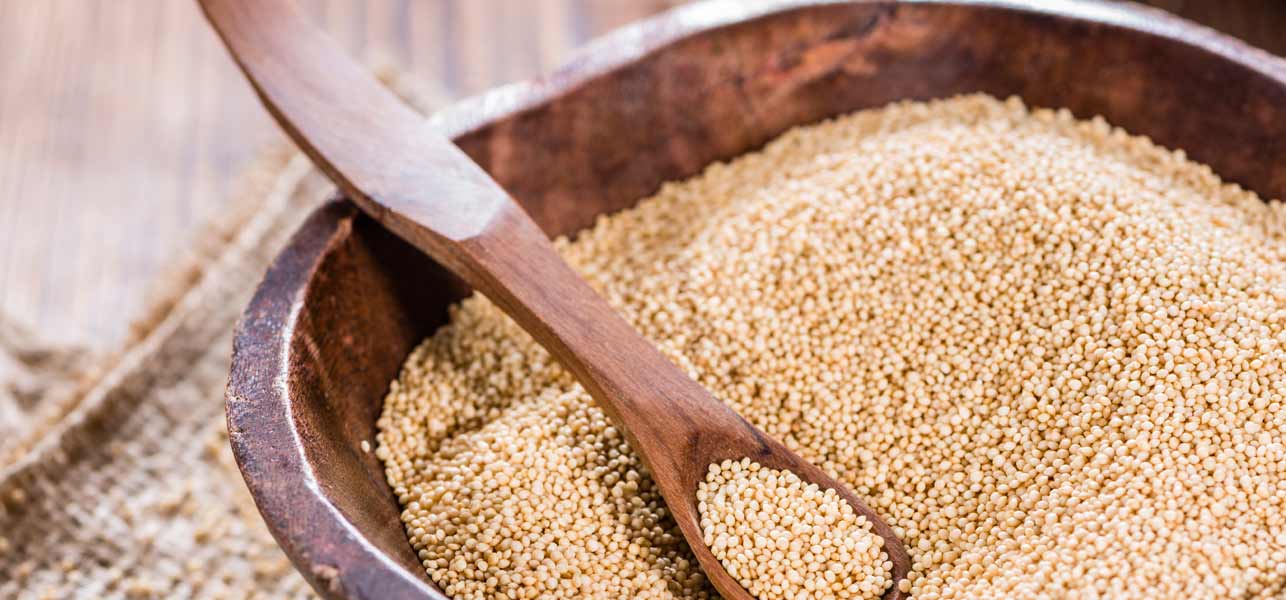
  • Amaranth:

    It is another natural treatment for hair problems like graying. Apply juice of fresh amaranth leaves and retain your black color back.

Amaranth for gay hair

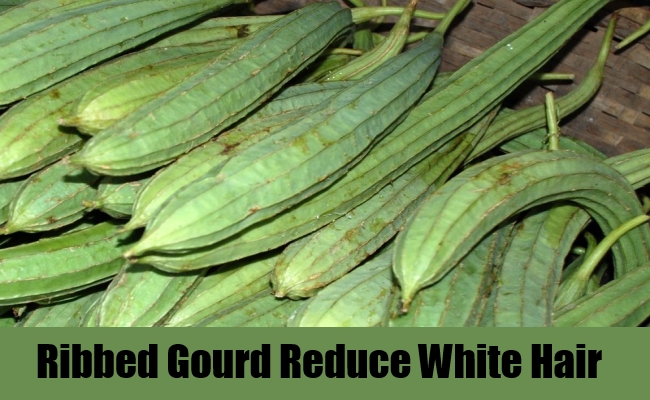
  • Ribbed Gourd:

    Take ribbed gourd and dry its pieces in shade & soak it in coconut oil for four days. Now boil it till the solid turns into the black residue. Massage your scalp with this oil to reduce premature graying.

Ribbed Gourd for white hair

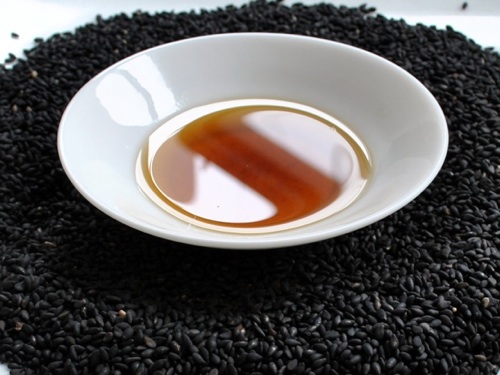
  • Black seed oil & olive oil:

    This treatment is used for so many years to cure gray hairs. Mix equal amounts of black seed oil & olive oil and massage it on your head. Leave it on your head for an hour then the wash. It will not only treat gray hairs but make them shiny and stimulate the growth.

Black seed oil & olive oil for grey hairs

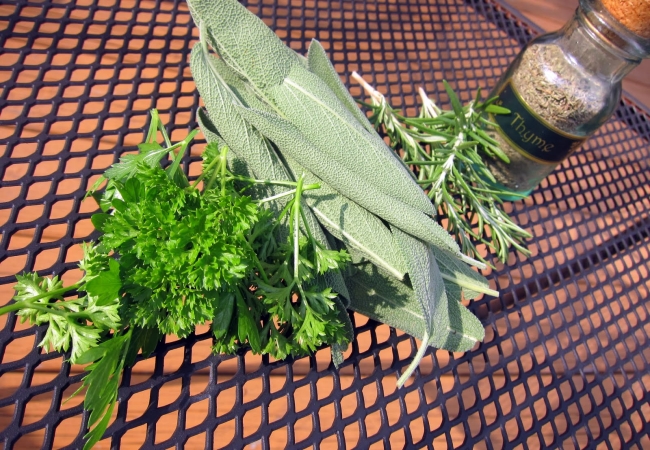
  • Rosemary & Sage:

    Boil half cup of rosemary and the half cup of sage for 30 minutes and let it cool for three hours before applying it. Shampoo when dry and repeat the procedure for days till you get desired results.

Rosemary & Sage

  • Potato peel rinse:

    Take peels of 5 potatoes and boil it in about two cups of water and let it simmer for 5 minutes. Remove it from heat and let it cool. Now strain and save the liquid. Add few drops of lavender oil or rosemary. Rinse your hairs with it just after shampooing but don’t rinse it out.

Potato peel rinse

See More As:

Best Facial Masks for Whitening Skin 

3 effective hair masks for hair loss treatments

Natural remedies to get rid of pimples & scars

read more
Beauty Tips and Health FitnessSkin Care

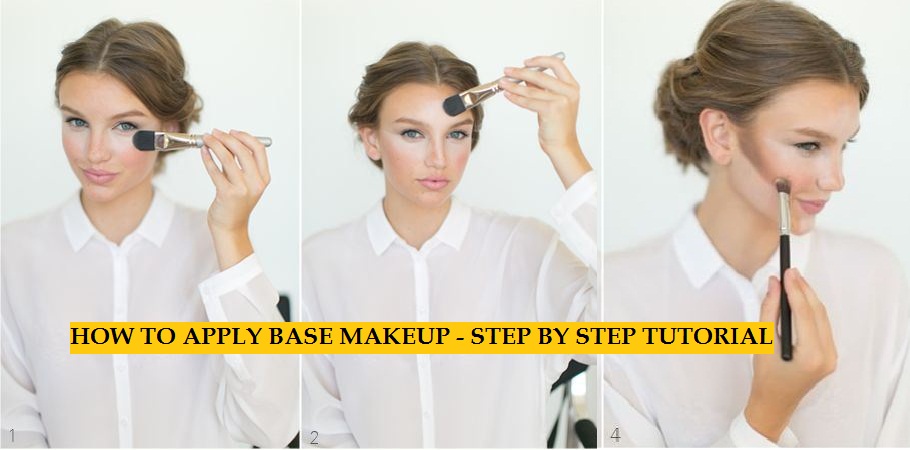
How to Apply Perfect Base Makeup Step by Step Tutorial

How-To-Apply-Base-Makeup-Tutorial step by step

The game of moving your brush the right way! Application of Base makeup or foundations is an essential part of every makeover without which you can’t proceed to blush your cheeks or to shade your eyes. This is very simple just mixing of shades and right use of sponge and brushes. So today we’ve got for you, a modern way of applying foundation that is actually been used by the makeup artist from early 90’s. Let’s explore their technique!

How to Apply Perfect & Flawless Base Makeup: Step by Step Complete Tutorial

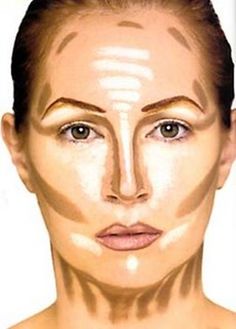
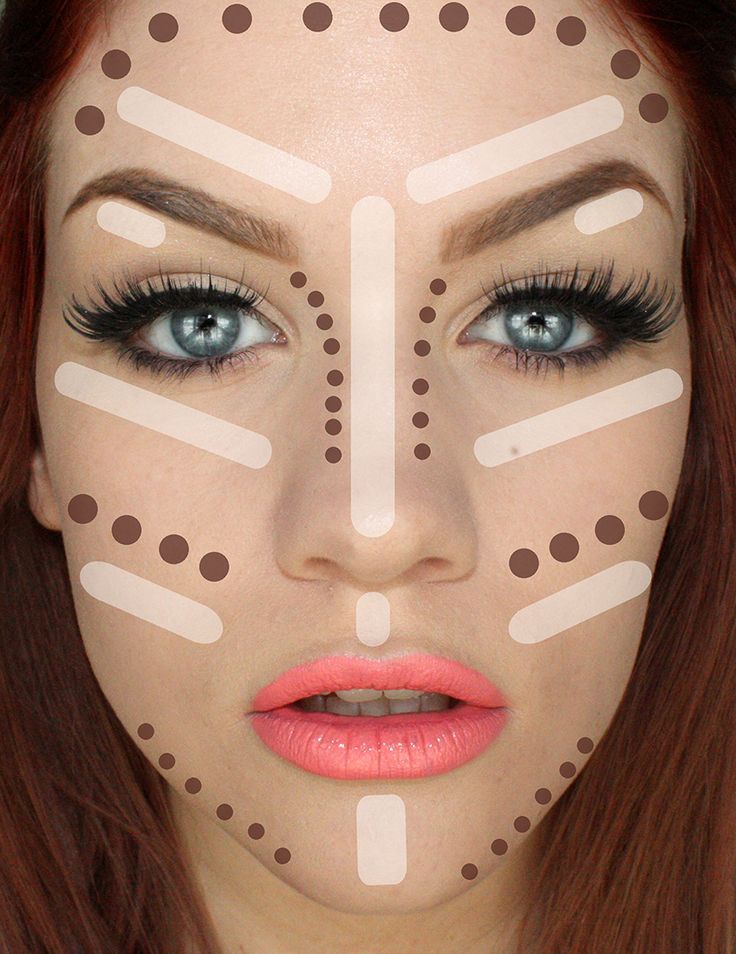
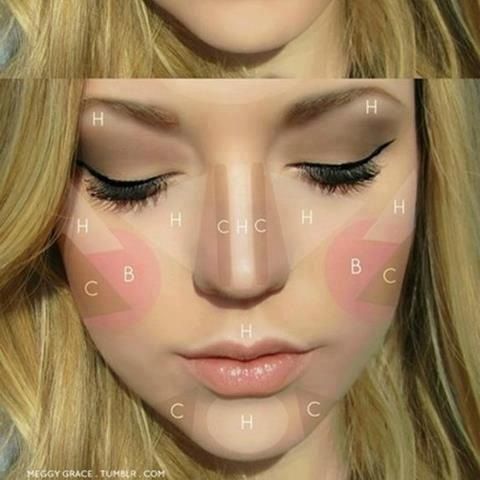
  1. The most needed thing that you must know is the face frame of contouring, the sections of your face to be defined and the sections to be highlighted. This is very important that you see the images from this point before applying anything so that you can understand what you’re going to do!

step1 (1)

step1 (2)

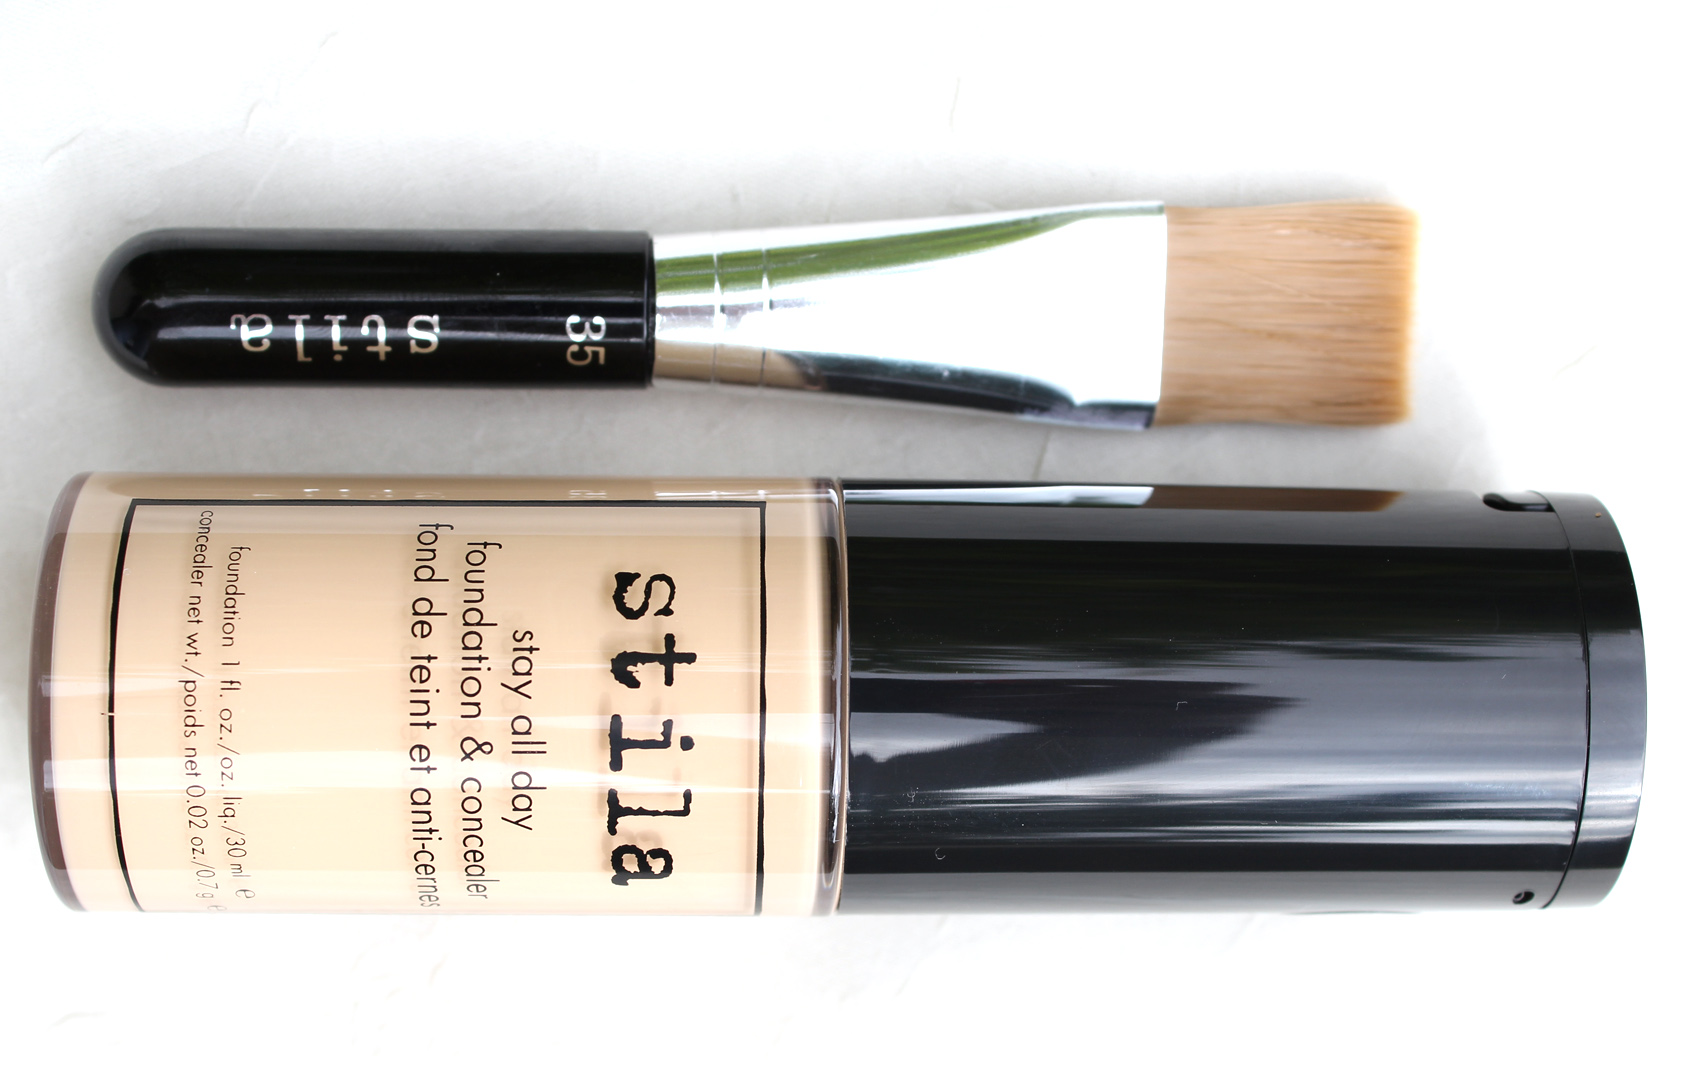
  • Let’s now start with the concealer, take your concealer and apply it to the spots, blemishes or dark circles to hide them and blend slightly. Better to apply it in stripes shape with a sharp/thin brush and blend it with finger movement.
step2 (3)


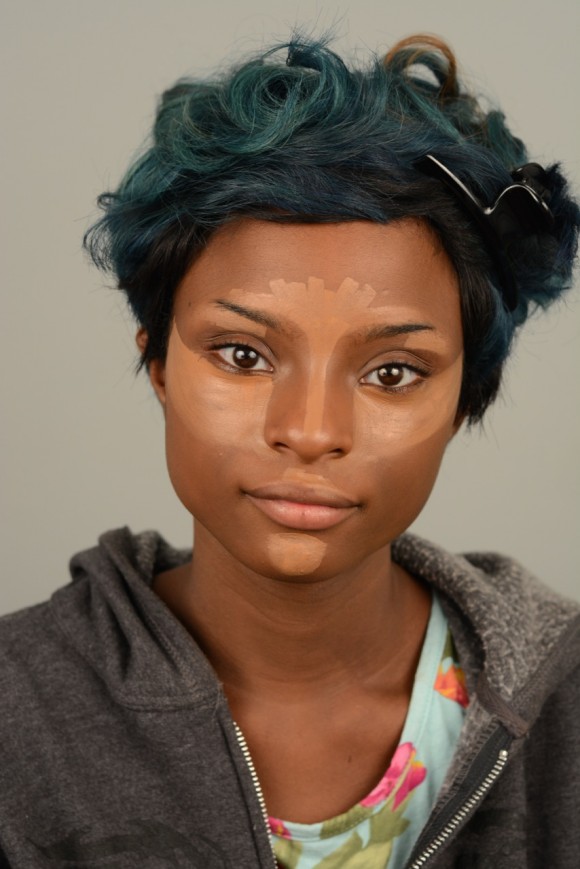
  • As described in the pictures of 1st, now you have the start highlighting certain sections of your face. So pick up a foundation 1-tone lighter than your natural skin tone and a medium brush to start this step. Put on this tone of base makeup underneath your eyes in the shape that is covered by a pilot or round shaped sunglasses; smear it on your chin; then apply it over the bridge of your nose dragging this shade towards the forehead and forming an upside down triangle of shade on forehead as shown in the pictures; and apply on the area over the cheekbone. After applying on these mentioned sections, soften the edges of sections shaded.
step3 (1)


step3 (2) step3&4

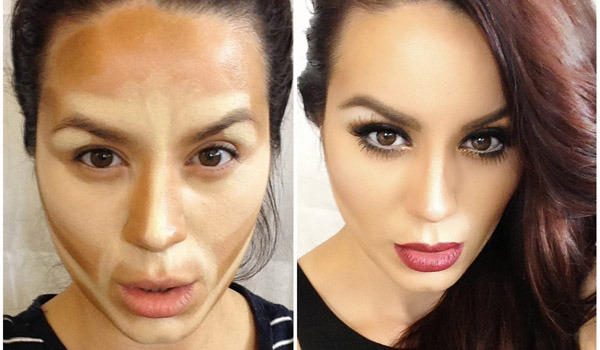
  • Time to define your face features with the base makeup! So grab a foundation 2 or 3-tone darker than your natural skin tone and a brush. Put on this darker contouring foundation under the cheekbones, on both sides of your nose bridge, underneath your jawline, and near your hairline on the forehead.

step4 (01)

step4 (2) step4 (3) step4 (4)

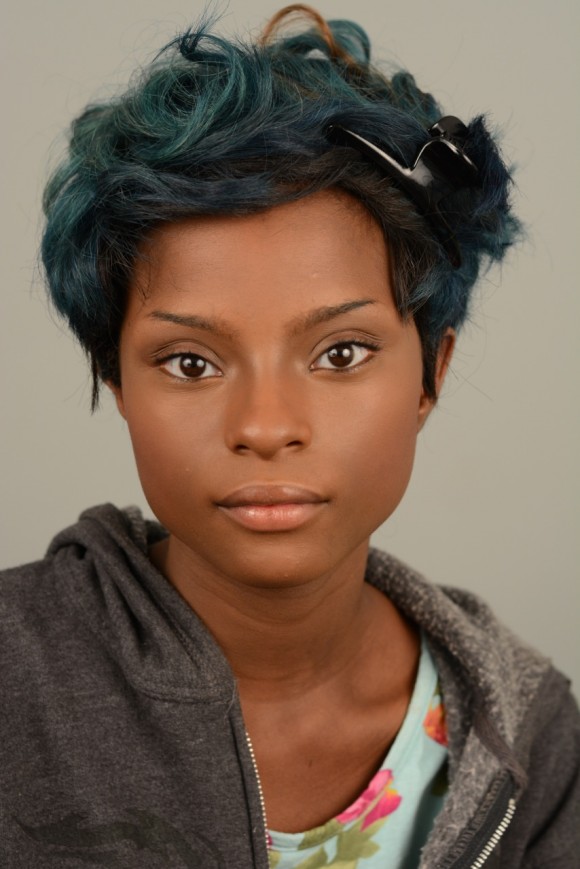
  • Now, as you’ve applied both the shades of foundations, so blend and blend the edges of the shaded section, soften the tones and contour well making it look natural.

step5 (1)

step5 (3) step5 (4) step5 (5)

  • Look in the mirror and see if you can find any spots that are still showing up if yes then cover them with the lighter tone or concealer and blend it matching with the base.

step6

  • Contour well until you make it settled over your face.

step7

  • Finish with a thin layer of face powder or translucent powder applied softly with a brush. But if you already have dry skin, then skip this step and you’re done with the base makeup and ready to continue with the rest of the cosmetics.

step8-final-look

We hope this tutorial would help you guys in preparing your base with your features well accentuated and skin well evened. Find more details, pictorial tutorials and inspirations on base makeup in the images below!

BASE MAKEUP LOOKS 

How-To-Apply-Base-Makeup-Tutorial (6)

How-To-Apply-Base-Makeup-Tutorial (5)

How-To-Apply-Base-Makeup-Tutorial (14) How-To-Apply-Base-Makeup-Tutorial (12) How-To-Apply-Base-Makeup-Tutorial (13) How-To-Apply-Base-Makeup-Tutorial (11) How-To-Apply-Base-Makeup-Tutorial (10) How-To-Apply-Base-Makeup-Tutorial (9) How-To-Apply-Base-Makeup-Tutorial (8) How-To-Apply-Base-Makeup-Tutorial (3) How-To-Apply-Base-Makeup-Tutorial (7) How-To-Apply-Base-Makeup-Tutorial (4) How-To-Apply-Base-Makeup-Tutorial (2) How-To-Apply-Base-Makeup-Tutorial (1) How-To-Apply-Base-Makeup-Tutorial (1)

See More As:

How to Apply a proper Blush On – Complete Tutorial 

How to apply a flawless lipstick to stay longer tutorial 
How to Apply a base foundation on face properly – Complete steps

read more
Beauty Tips and Health FitnessSkin Care

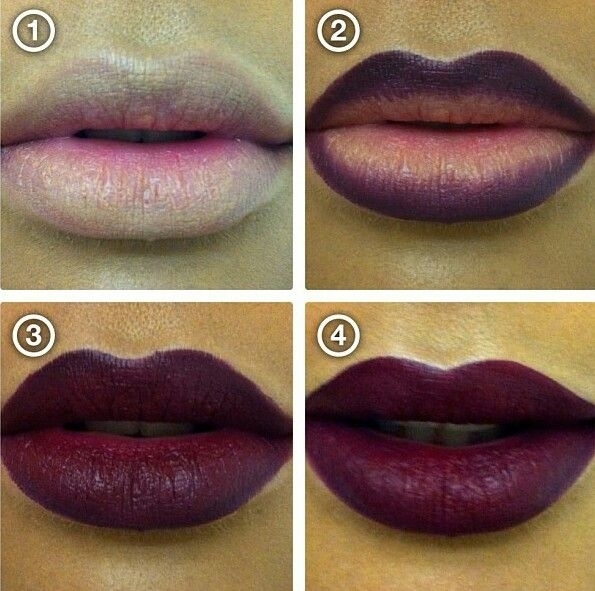
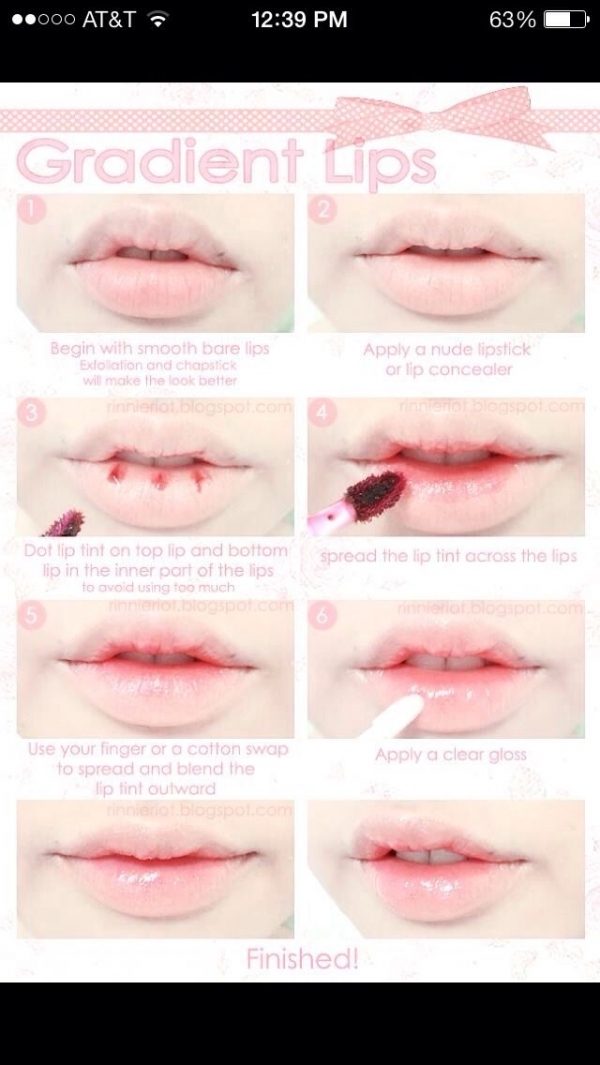
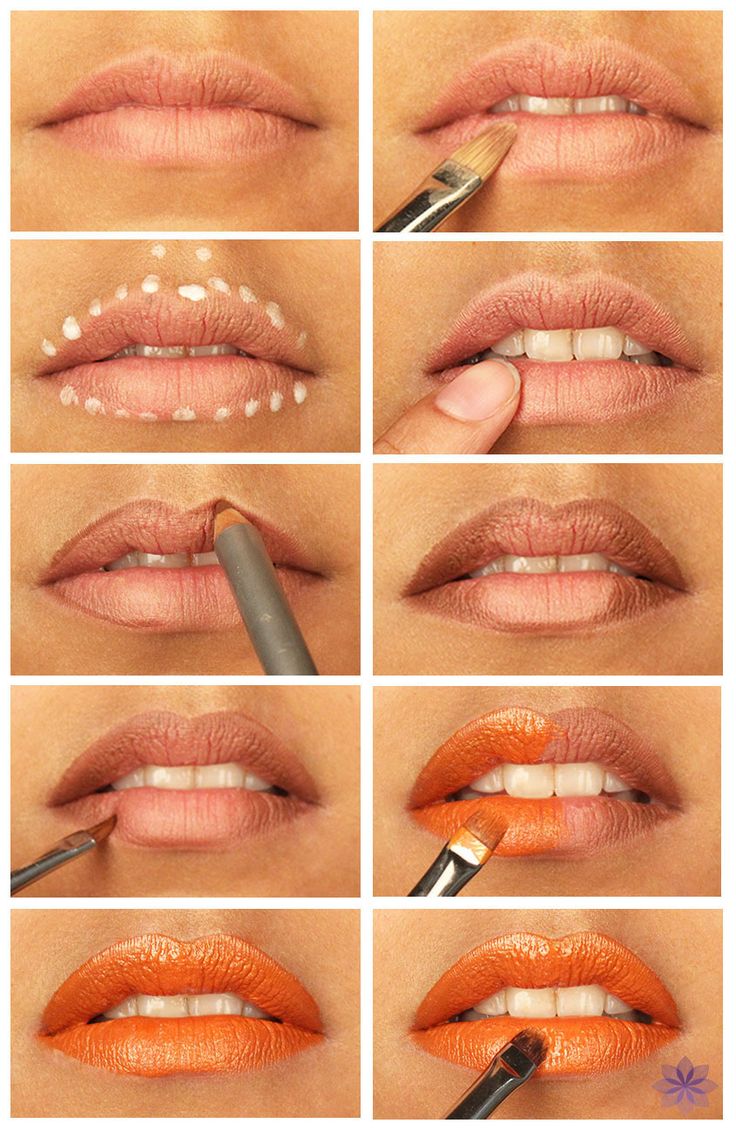
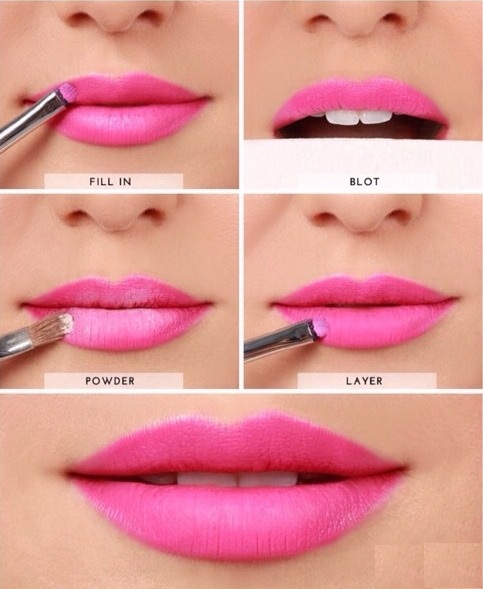
How to Apply Lipstick Properly to Stay Longer – Step by Step Tutorial
how-to-apply-lipstick-step-by-step-tutorials

Wait, Wait! Don’t jump over your lips with that lipstick, would you like to pull over a rough clot of lip color on your lips? Off course not, you’re following the fashion hub, not a painting corner, so just following the simple and the right way of doing simplest thing would make your look more promising. Here, we have a very simple tutorial covering each step of applying lipstick the right way so that it looks nice & clean and lasts longer.
How to Apply Lipstick Properly to Stay Longer- Step by Step Tutorial

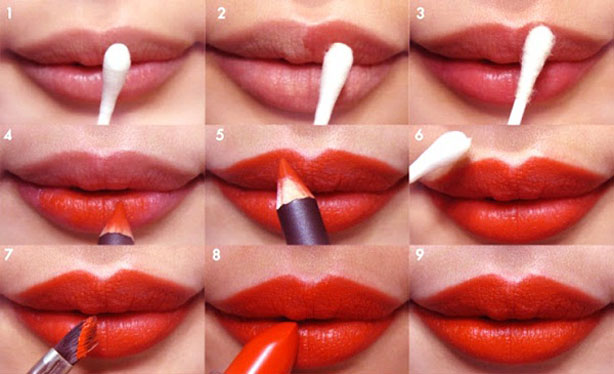
  • Lipstick goes fine on smooth lips! Prepare yours for the application of color by first exfoliating them with the help of sugar scrub, mascara brush or your toothbrush. Remember! Whatever you are using, do it with a gently.

step1

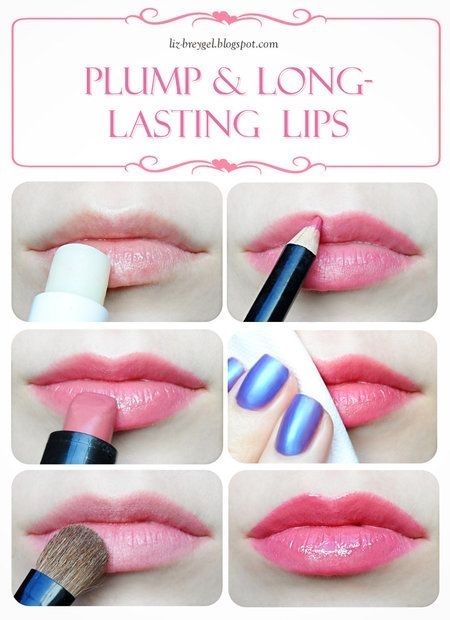
  • Then use a thin layer of lip balm to smooth the lips.

step2-smooth-lips

  • What if the liner doesn’t show up the much you want? Simply prime your lips, you can use primer, translucent powder, concealer or foundation over your pots so that the liner and color saturate well. This would also make the lipstick stick for longer.

step3 step3-apply-foundation

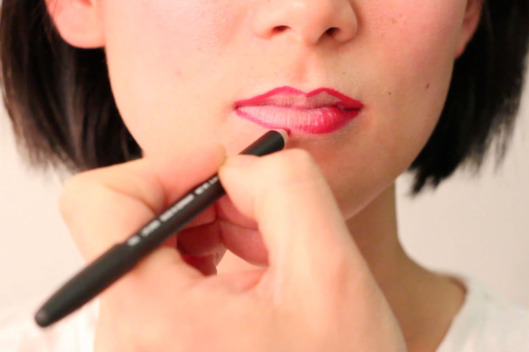
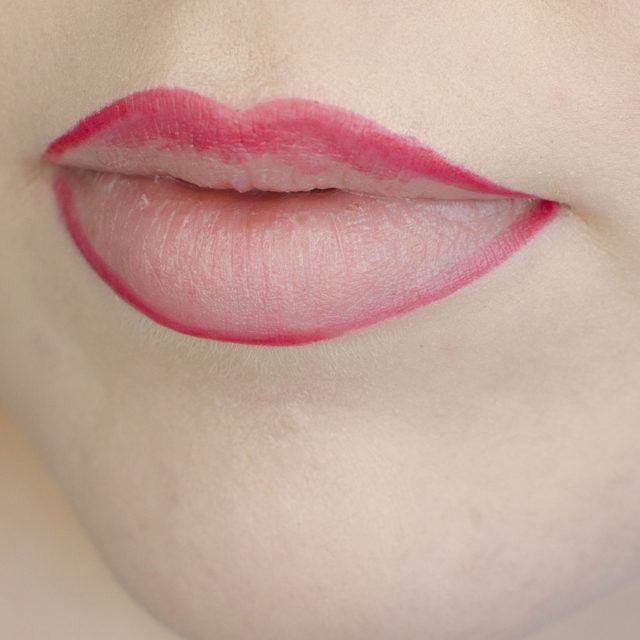
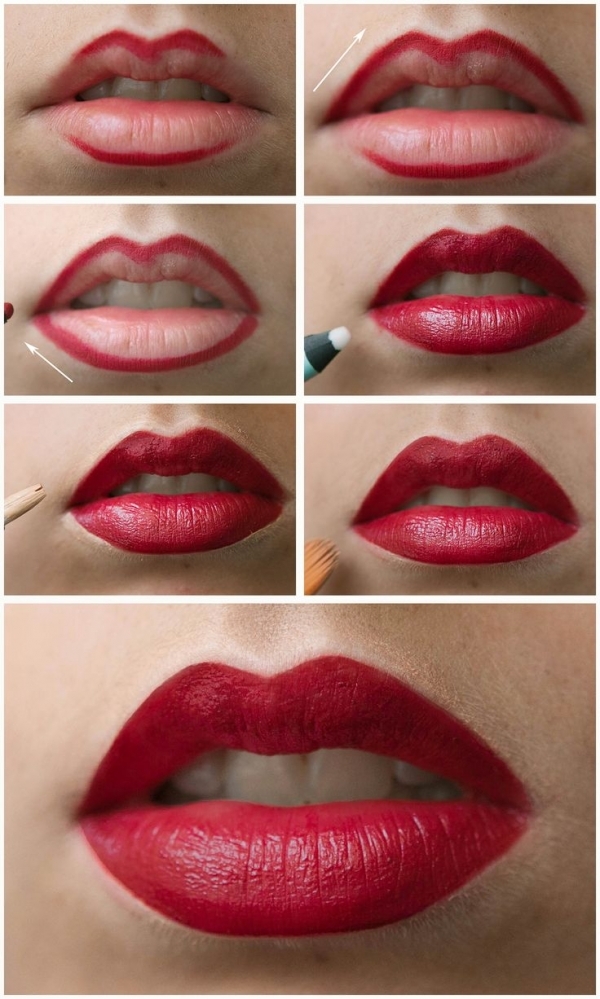
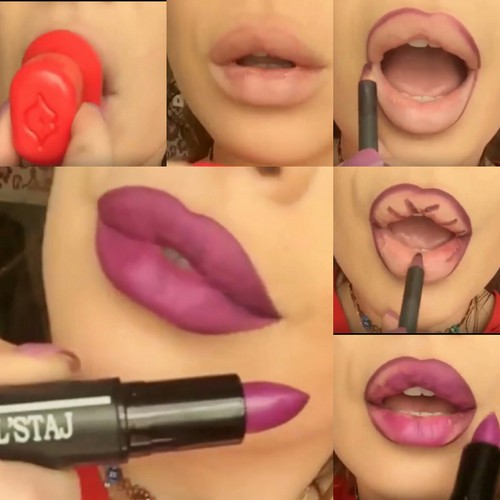
  • Outline your lips! Apply liner to your lower lip line, cross (“X”) mark the cupid as shown in the images below, and Pull a line on your top lip line from the outer corner towards the cupids bow.

step4 step4-outline

  • Now join up all the small lines and complete the frame of pouts and do another simple thing, slightly open your mouth and draw the very corner edges staying inside your natural lines.

step5 step5-join-the-lines (2) step5-join-the-lines

  • Keep holding your pencil, and fill in the whole pouts with it at first so that the lipstick gets something to stick.

step6 step6-fill-in-with-liner

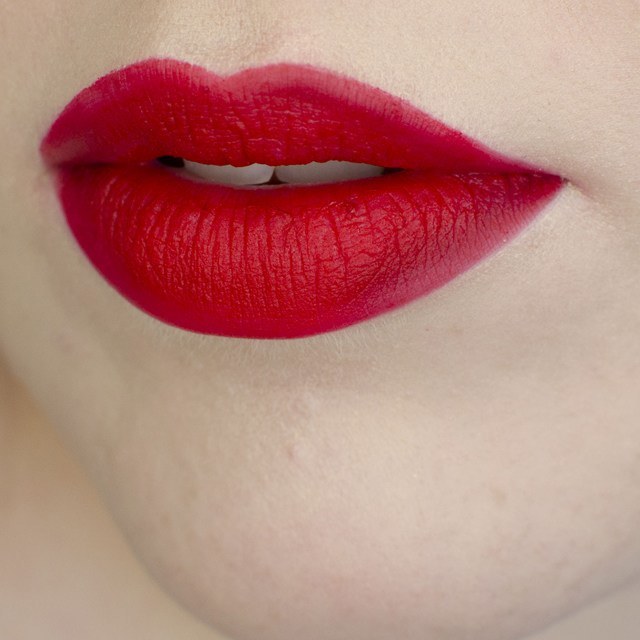
  • The time in now! Grab your lipstick and fill in the whole lips with it now. Take care of the edges your outlines neatly; if you fill like messing them up with lipstick then you can also use a lip brush loaded with the lipstick and fill the edges neatly using that brush. This would keep your look as sharp as you dreamed.

step7

  • Grab a tissue paper, and press it softly to your mouth to spot to remove the extra cream of lip color.

step8

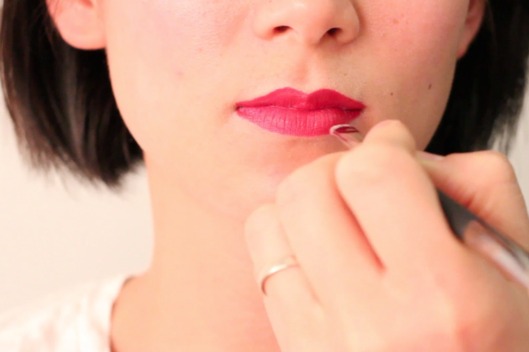
  • Define the lips a bit more! Load an angled brush with concealer and apply a thin layer of it on your lips, this would accentuate the shape of your pouts.

step9

  • Furthermore, if you desire the glossy look, simply add in the center of the lips. Trust your fashion hub this is the best way to add a glossy effect that doesn’t look like melting and dripping away.

step9-accentuate step9

  • Enjoy the best lipstick applied! And as you know for every work there are some ways, so some other tips and tutorials can be found in the pictures attached below. Have a lippy day and never miss out the right way of adding details in your makeover!

step10


Lip Tutorials – Simple & Easy

how-to-apply-lipstick-step-by-step-tutorial (28)

how-to-apply-lipstick-step-by-step-tutorial (25)

how-to-apply-lipstick-step-by-step-tutorial (18) how-to-apply-lipstick-step-by-step-tutorial (20) how-to-apply-lipstick-step-by-step-tutorial (21) how-to-apply-lipstick-step-by-step-tutorial (27) how-to-apply-lipstick-step-by-step-tutorial (26)

how-to-apply-lipstick-step-by-step-tutorial (12) how-to-apply-lipstick-step-by-step-tutorial (15) how-to-apply-lipstick-step-by-step-tutorial (6) how-to-apply-lipstick-step-by-step-tutorial (9) how-to-apply-lipstick-step-by-step-tutorial (4) how-to-apply-lipstick-step-by-step-tutorial (2)

how-to-apply-lipstick-step-by-step-tutorial (24) how-to-apply-lipstick-step-by-step-tutorial (19)

See More As:

How to apply a proper Blush On Step by Step Tutorial

How to apply liquid eyeliner step-wise tutorial

How to apply Base Foundation on Face Properly

read more
1 2 3 4 5 6 7
Page 4 of 7